Team Member Guide (iOS)
Covers everything a Team Member needs to use AFS Connect on an iPhone: activating your account, finding and working shifts, clocking on and off, and managing your profile. This is the same walkthrough as the Android version, with iPhone screens and iOS-specific notes where the two platforms differ. Managers on iOS should follow this guide for everyday tasks and the Manager Guide (iOS) for Manager-only features.
1. Getting Started
AFS Connect is used to view and claim available shifts, and to record your attendance at site using your phone.
You'll receive an activation code by email when your Contractor Manager or AFS invites you (your manager can also give you the code directly). Once you have it:
- Open AFS Connect and tap First time? Activate your account.
- Enter the Activation Code from your invitation.
- Enter your Email Address (this must match the email your invitation was sent to).
- Enter your First Name and Last Name.
- Enter a New Password (minimum 8 characters) and enter it again in Confirm Password.
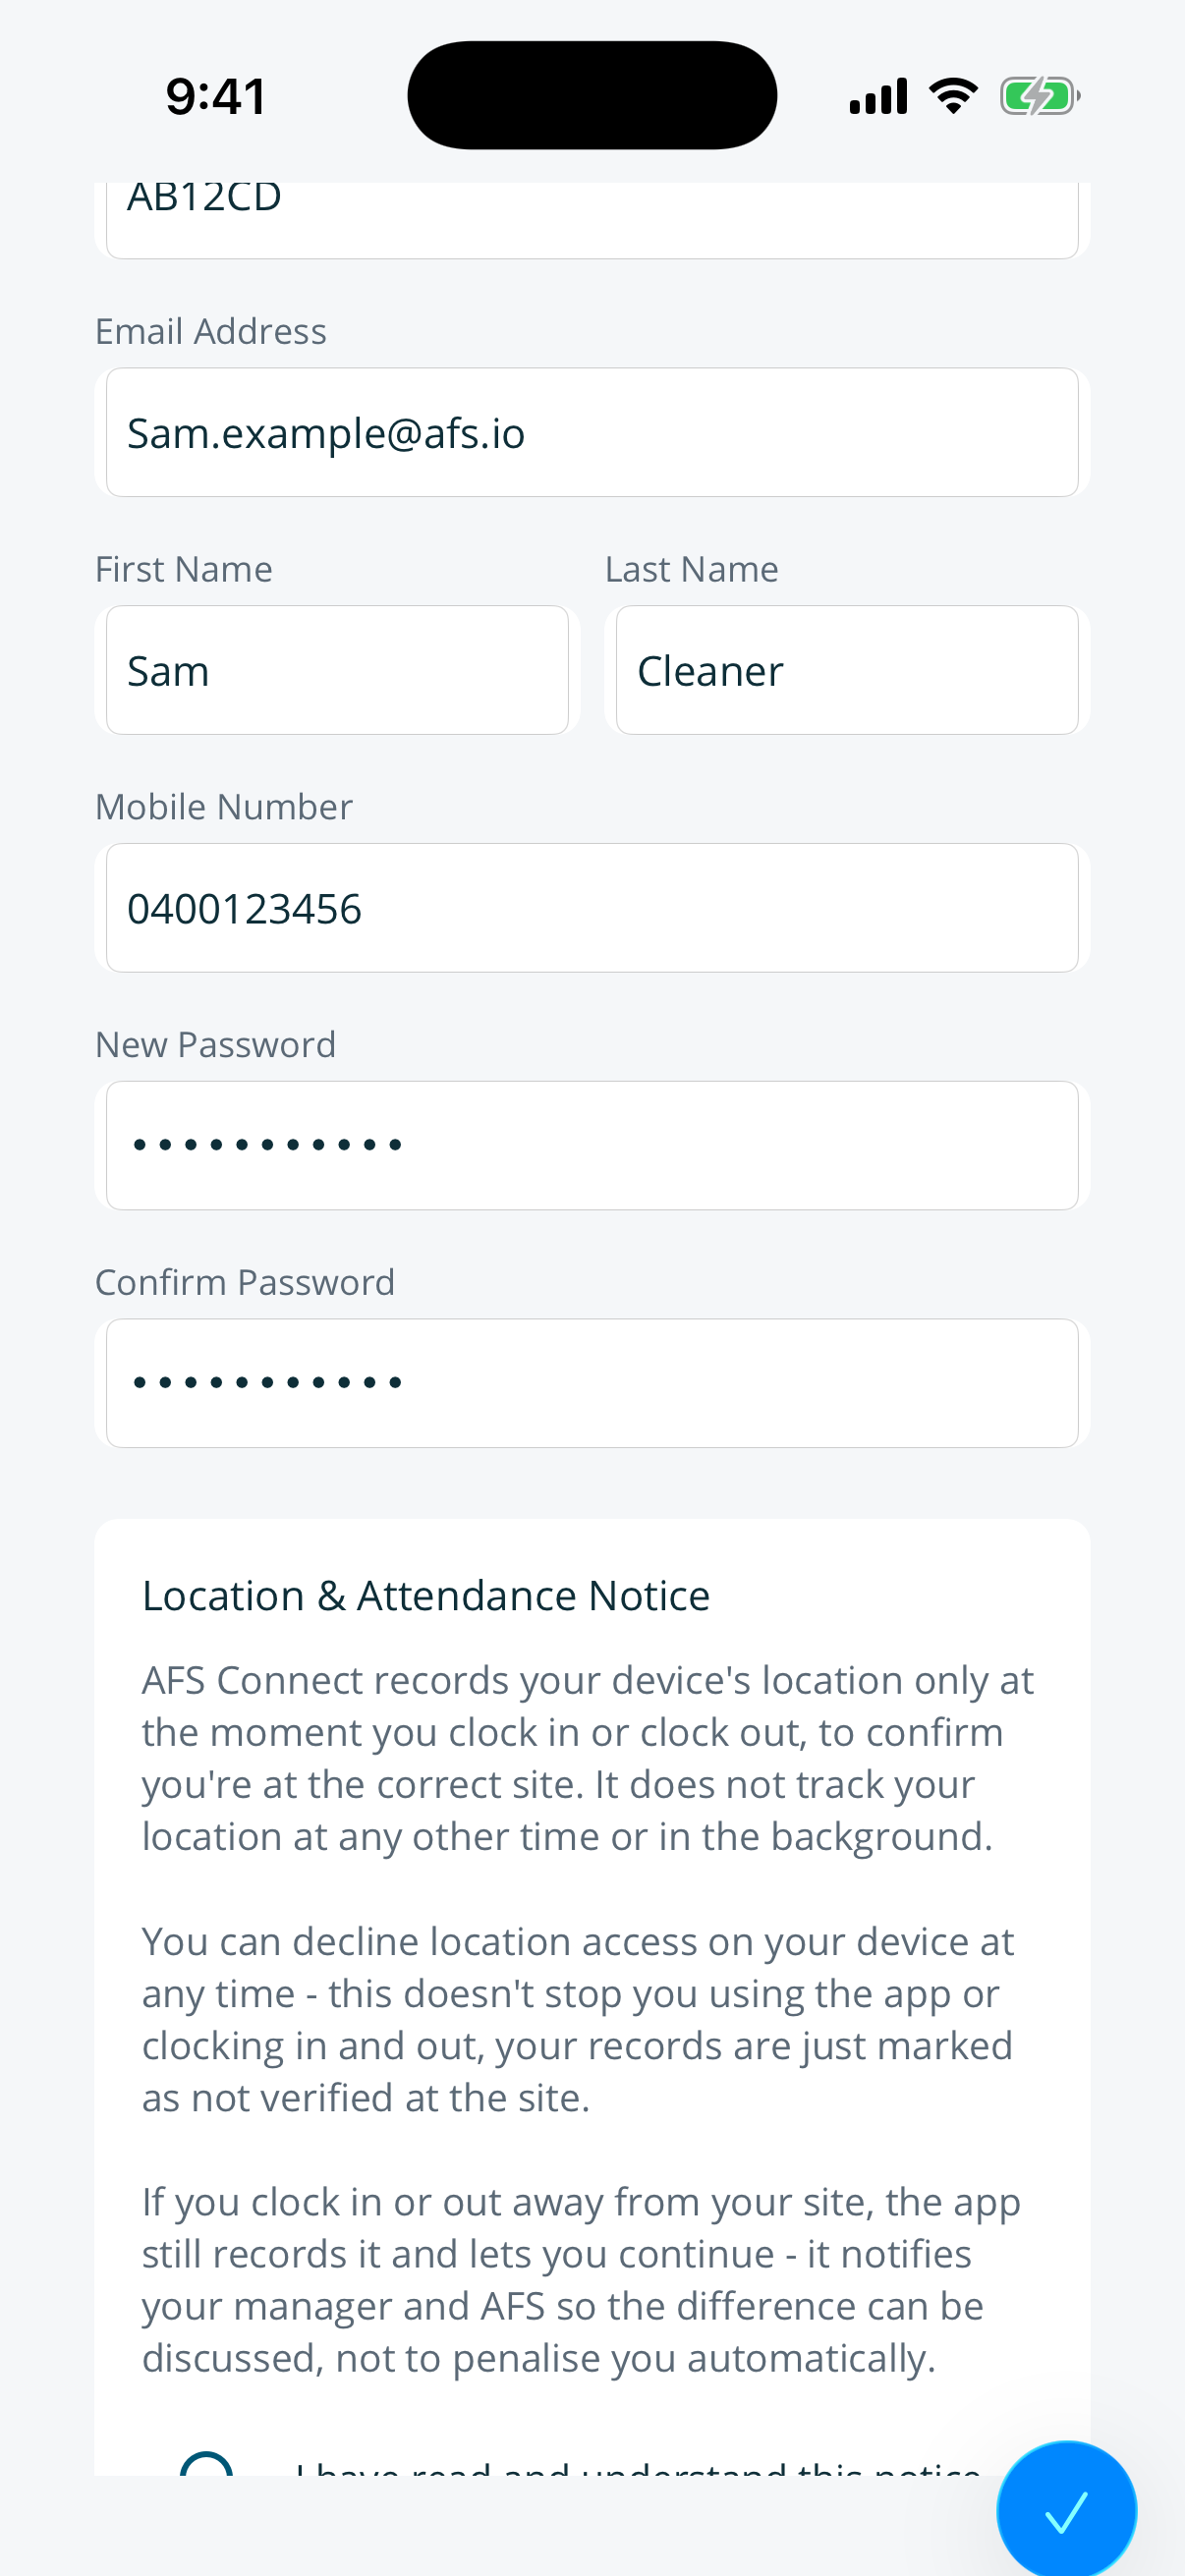
Tap Activate Account. You'll be signed in immediately, no separate first sign-in step is needed, and taken straight to your Attendance tab.
2. Signing In
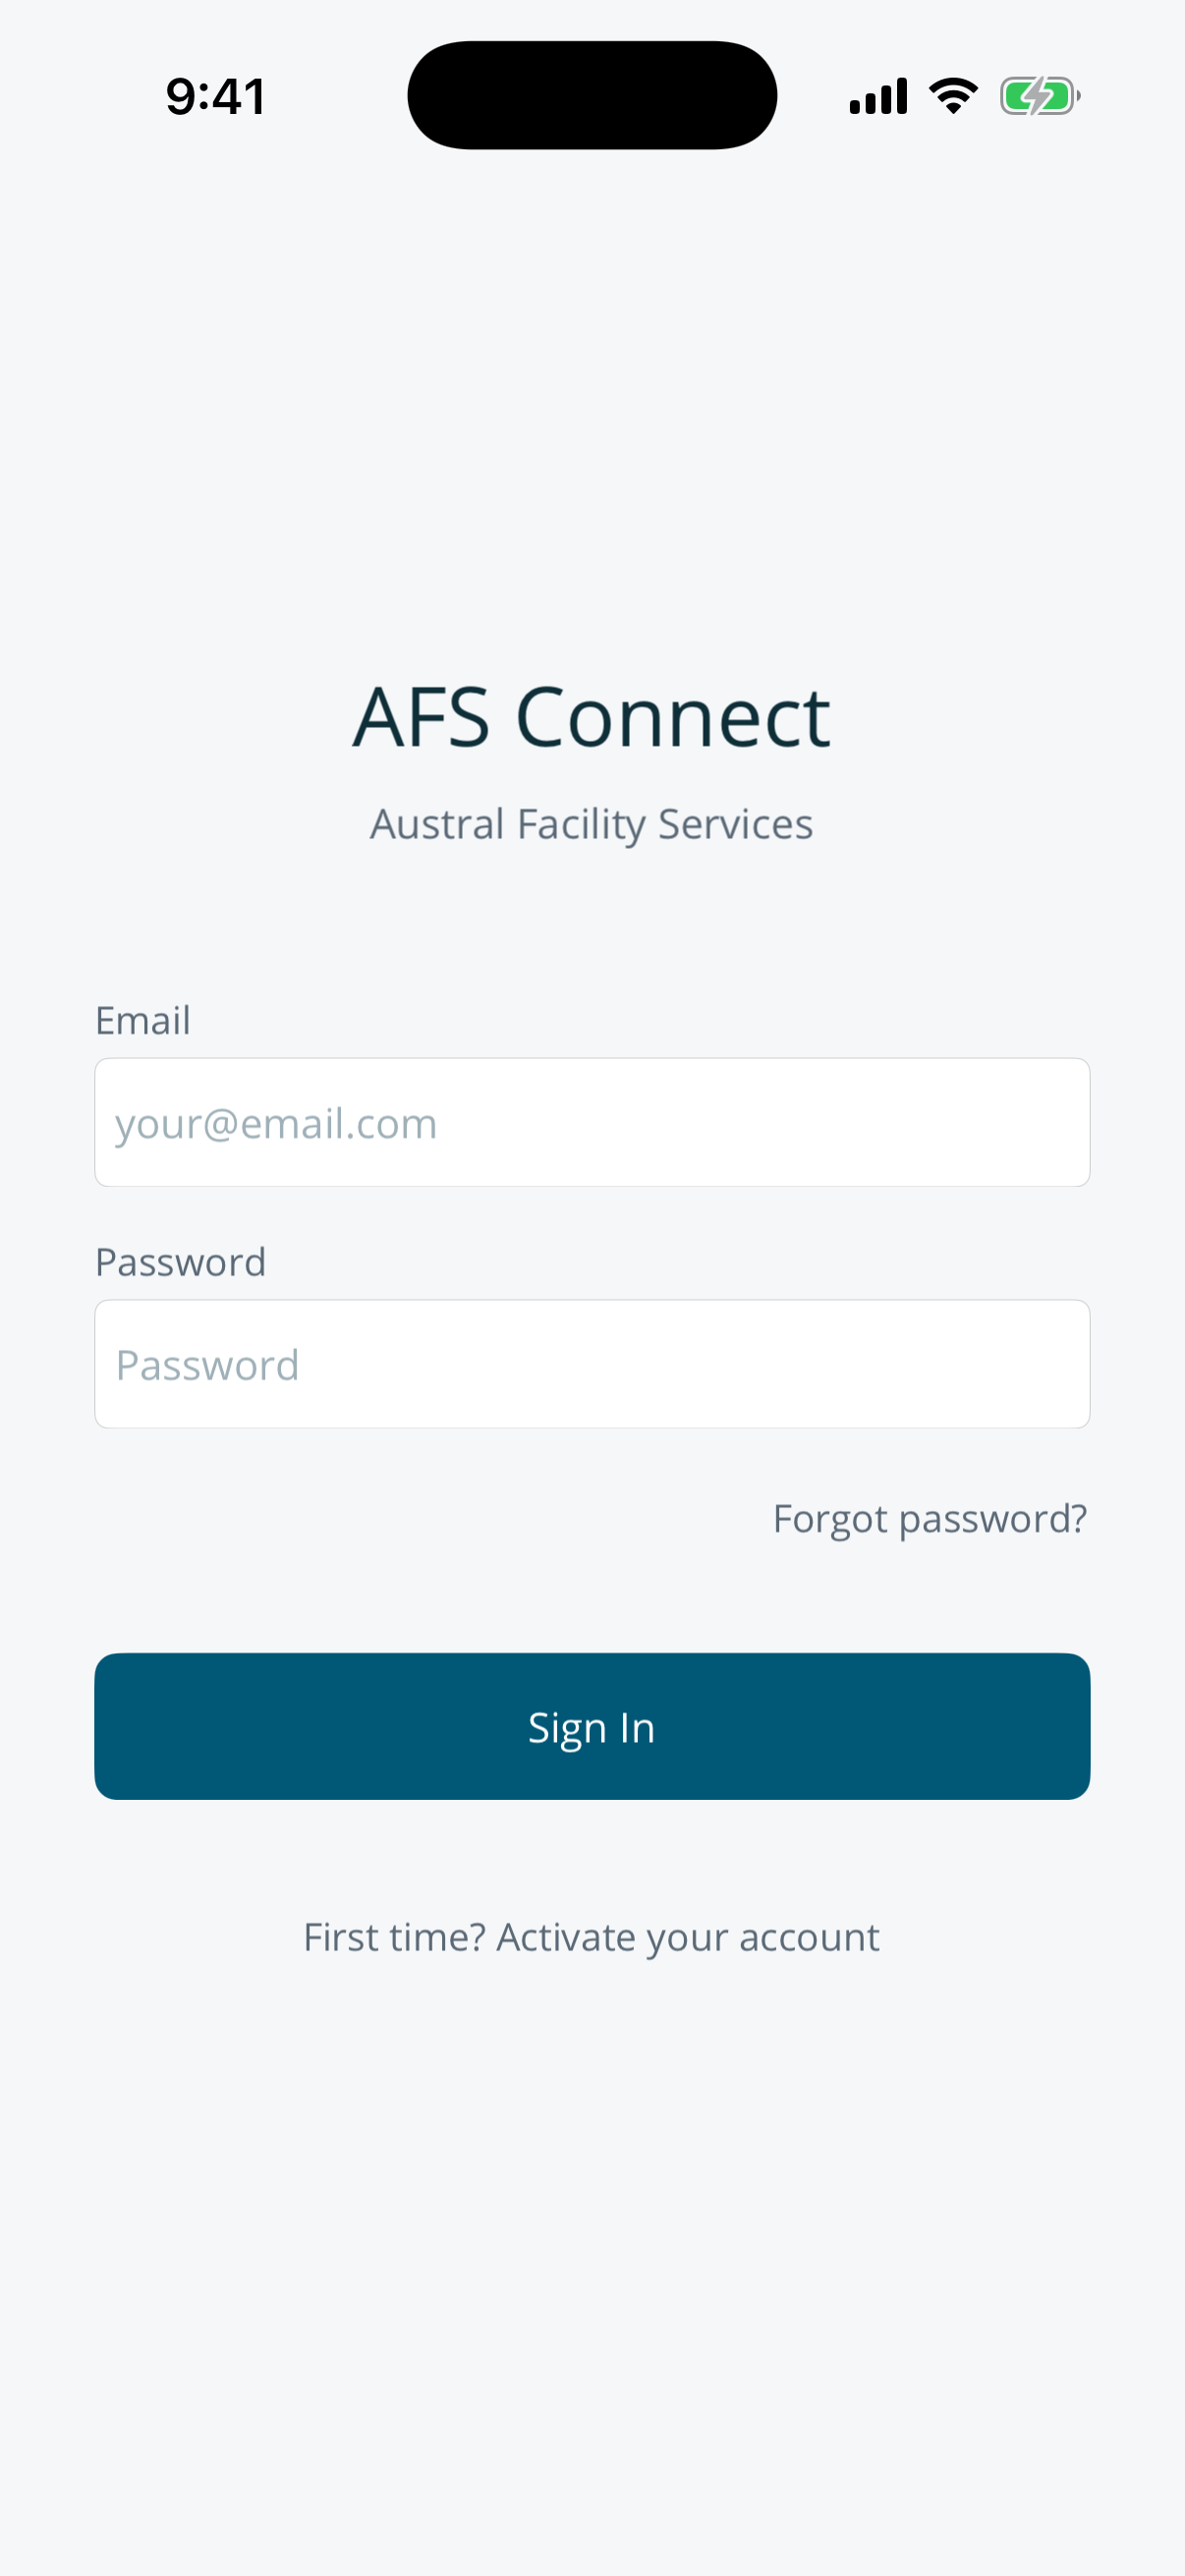
Once your account is active, sign in any time with your email and password.
- Enter your Email and Password.
- Tap Sign In.
3. Forgotten Your Password?
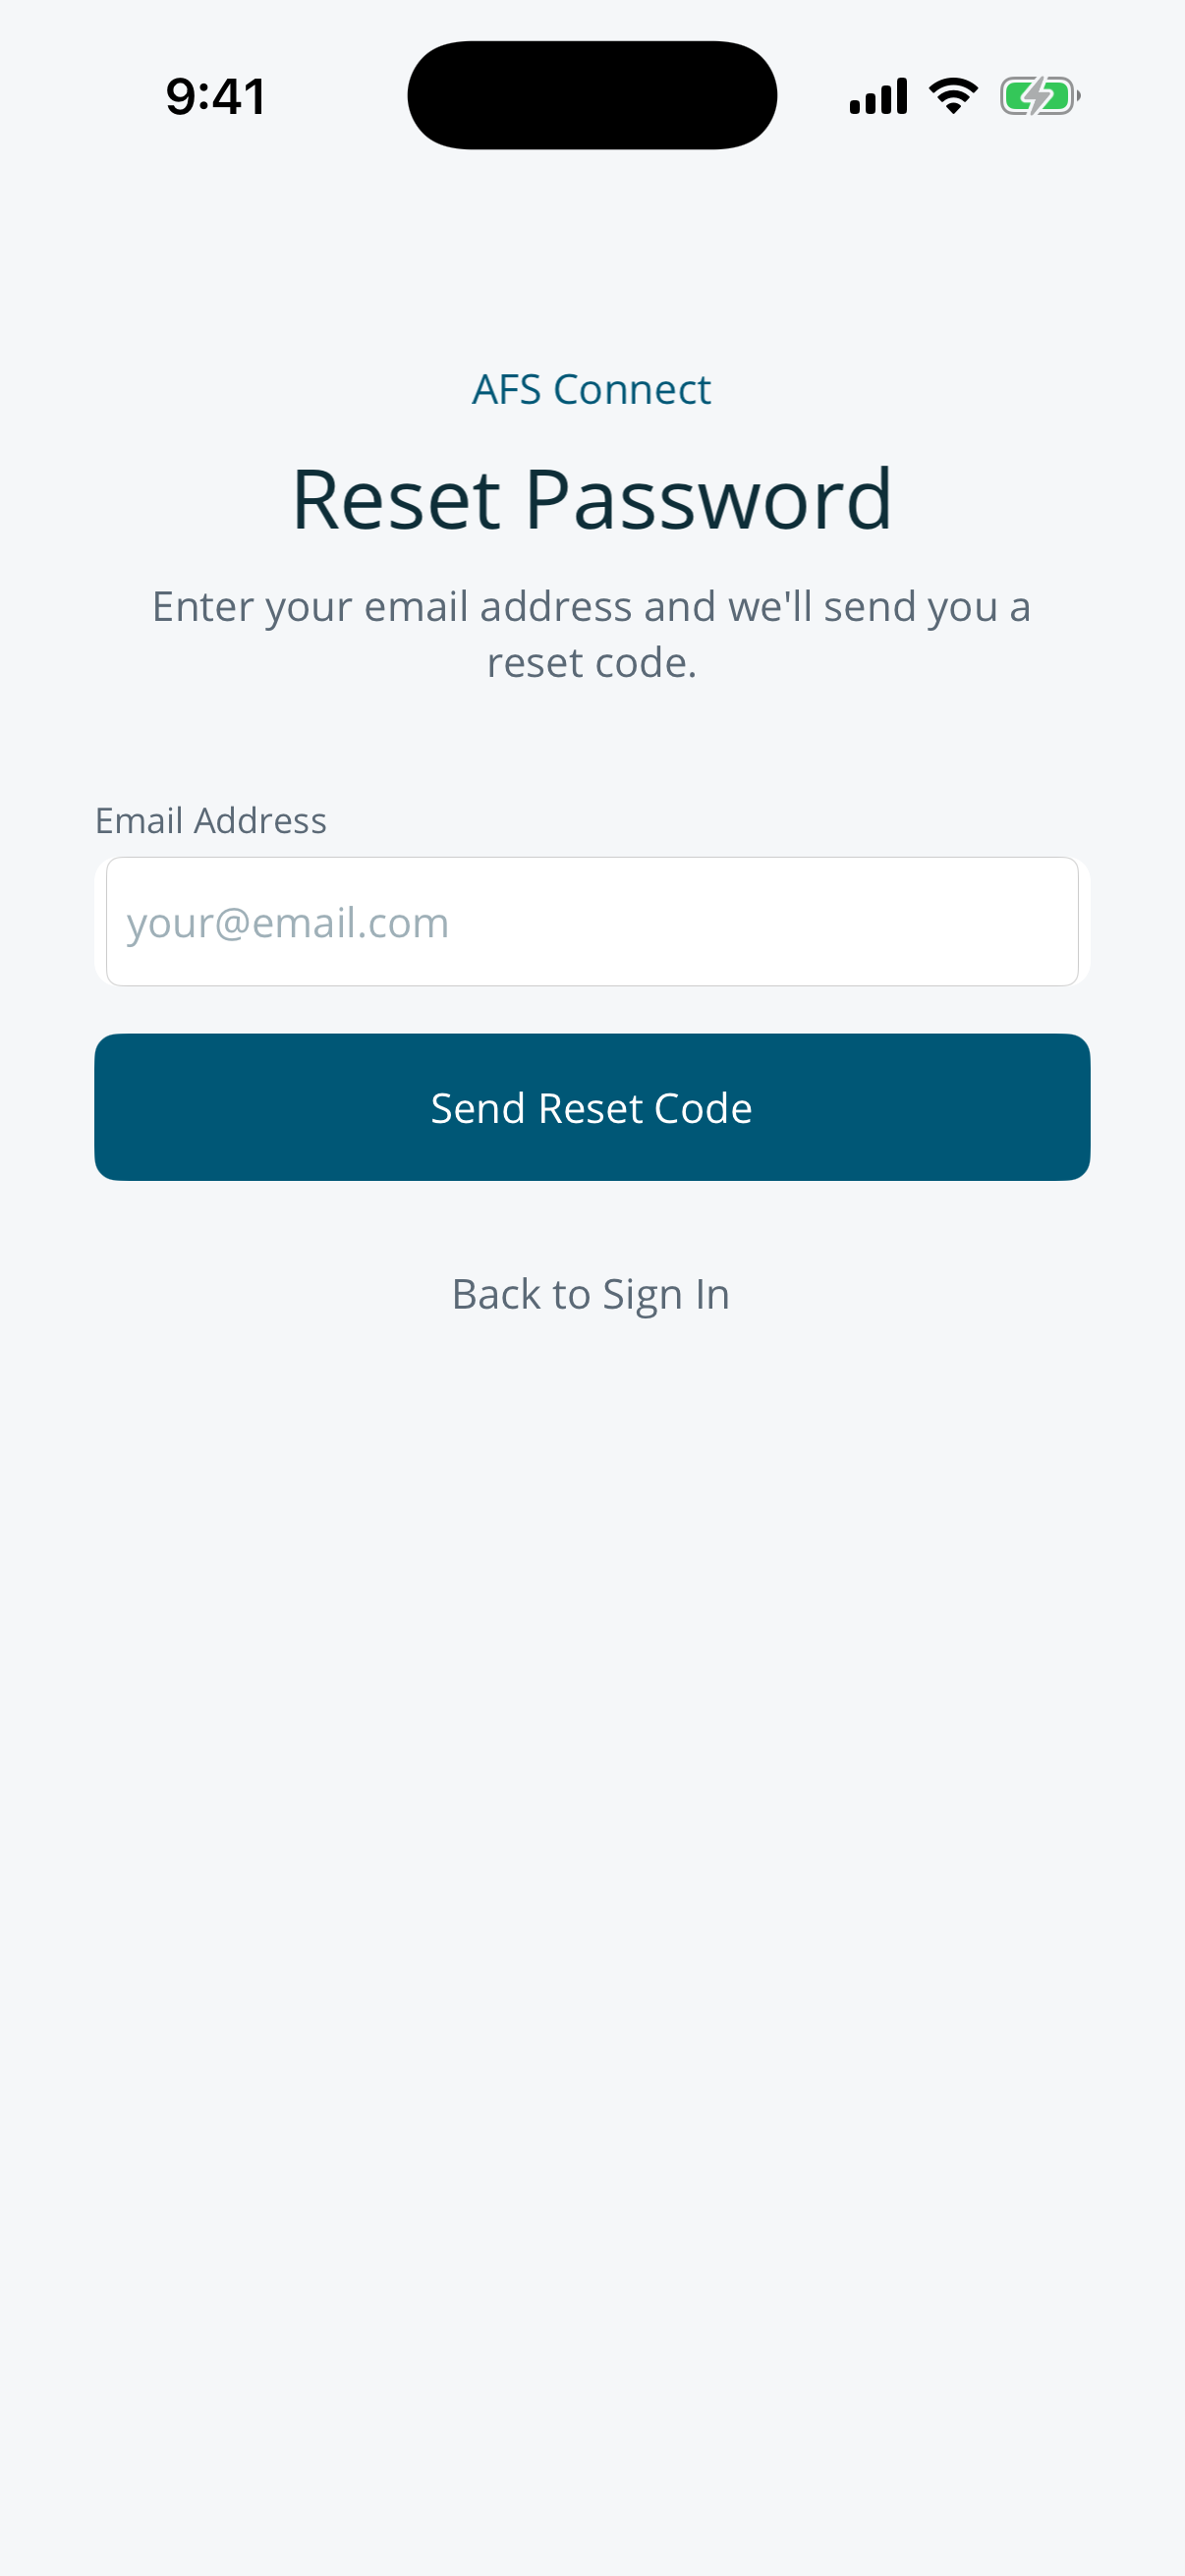
- On the sign-in screen, tap Forgot password?.
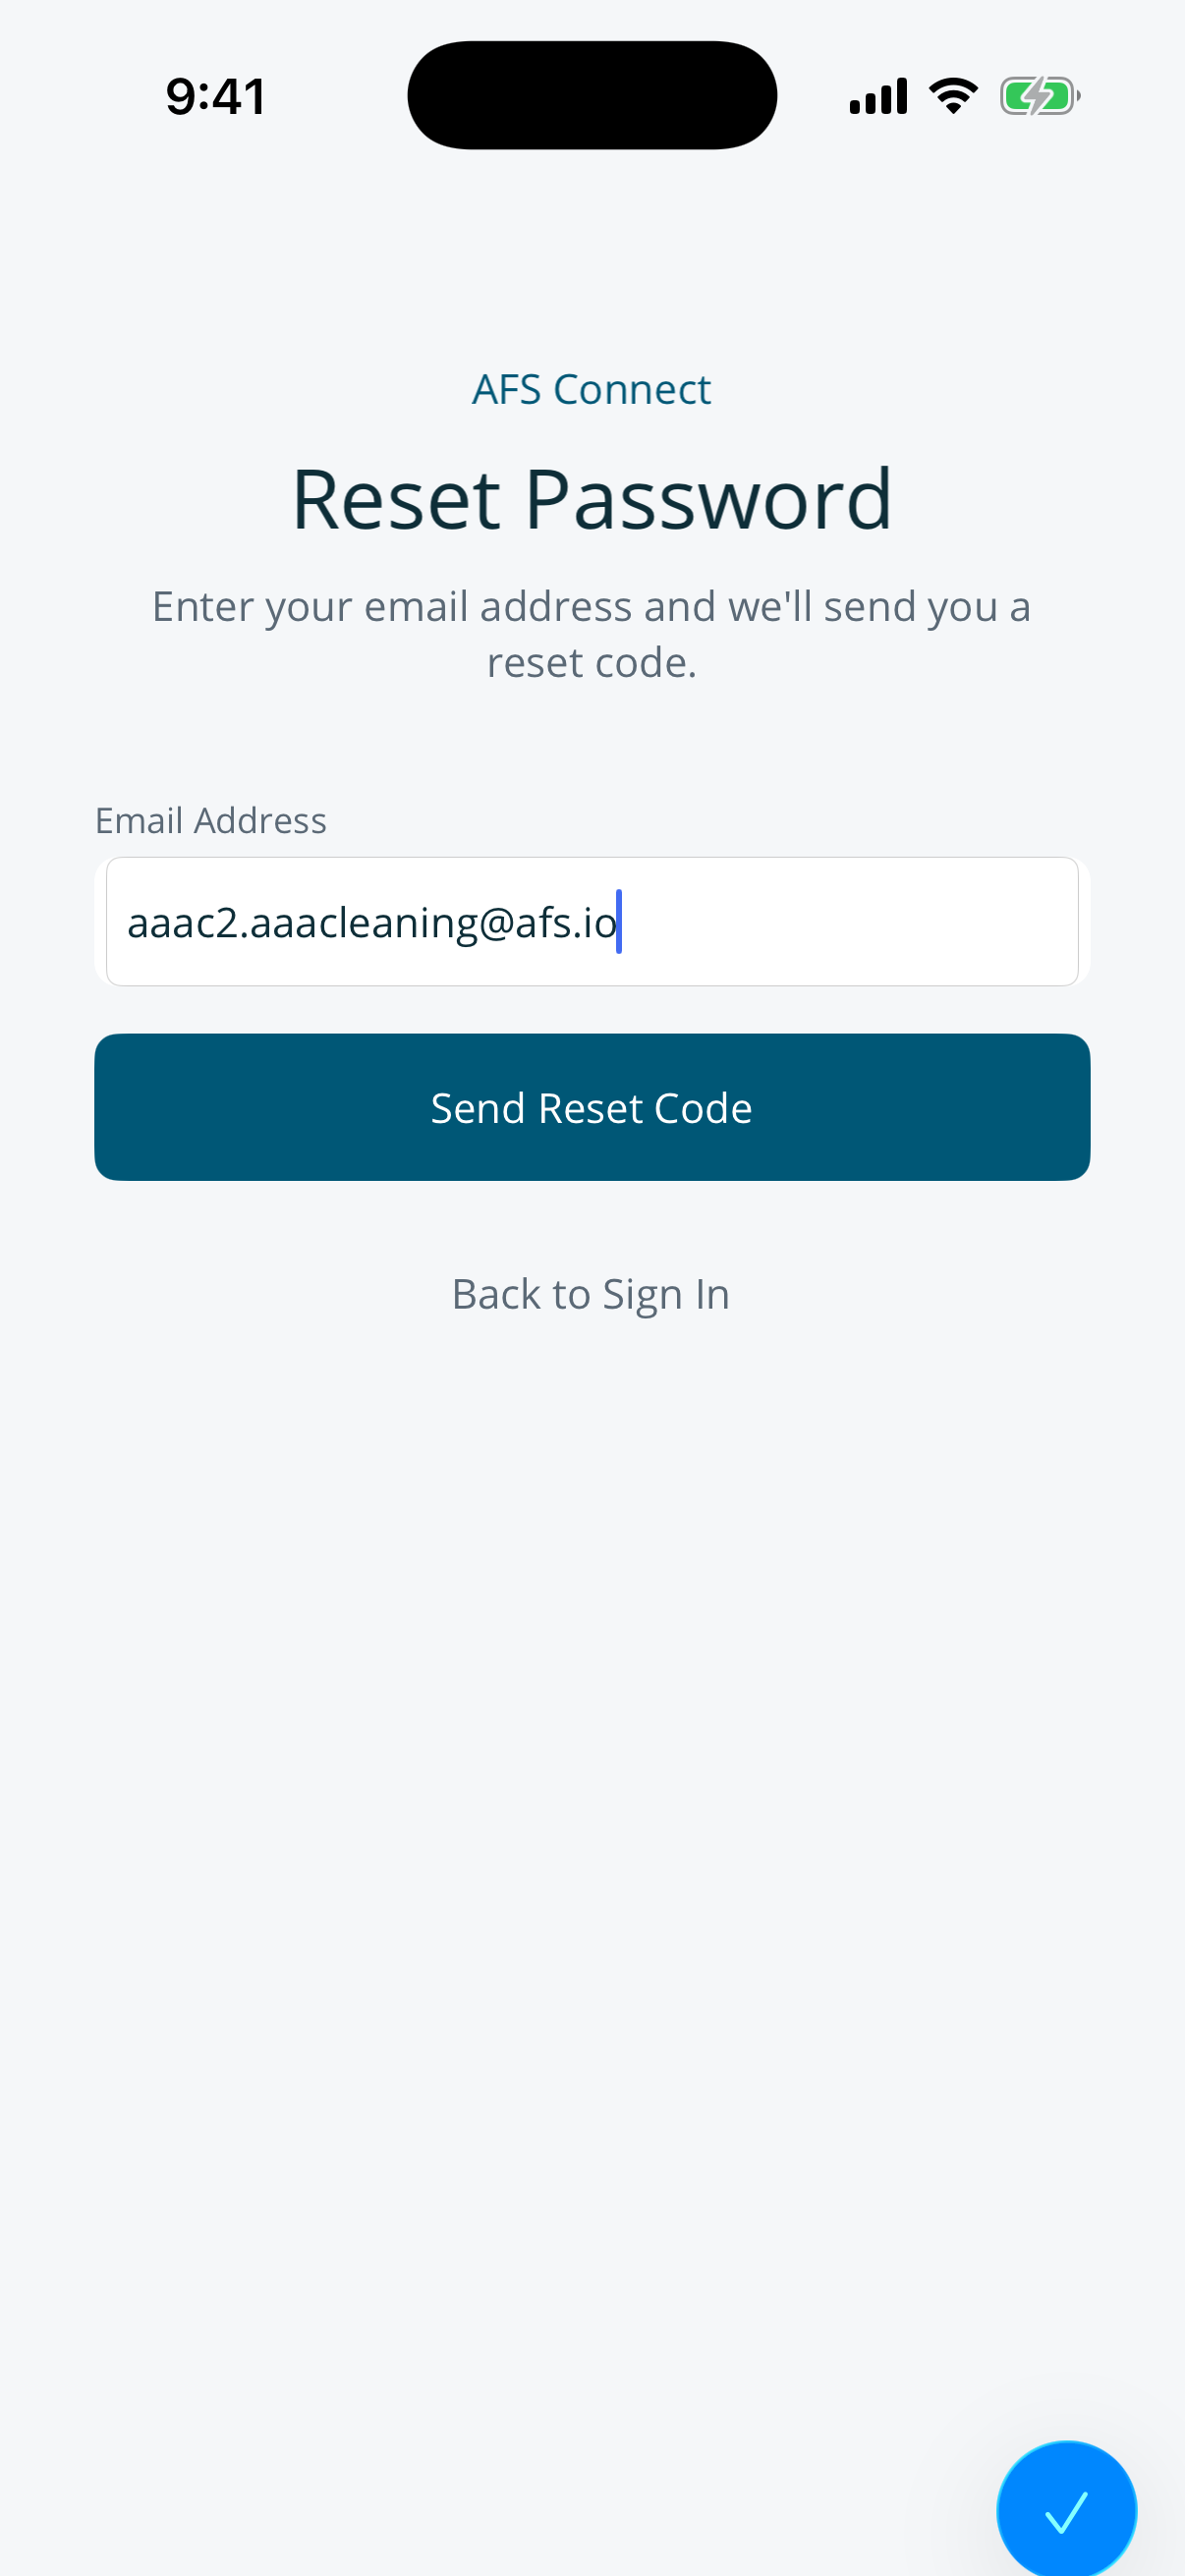
- Enter your Email Address and tap Send Reset Code.
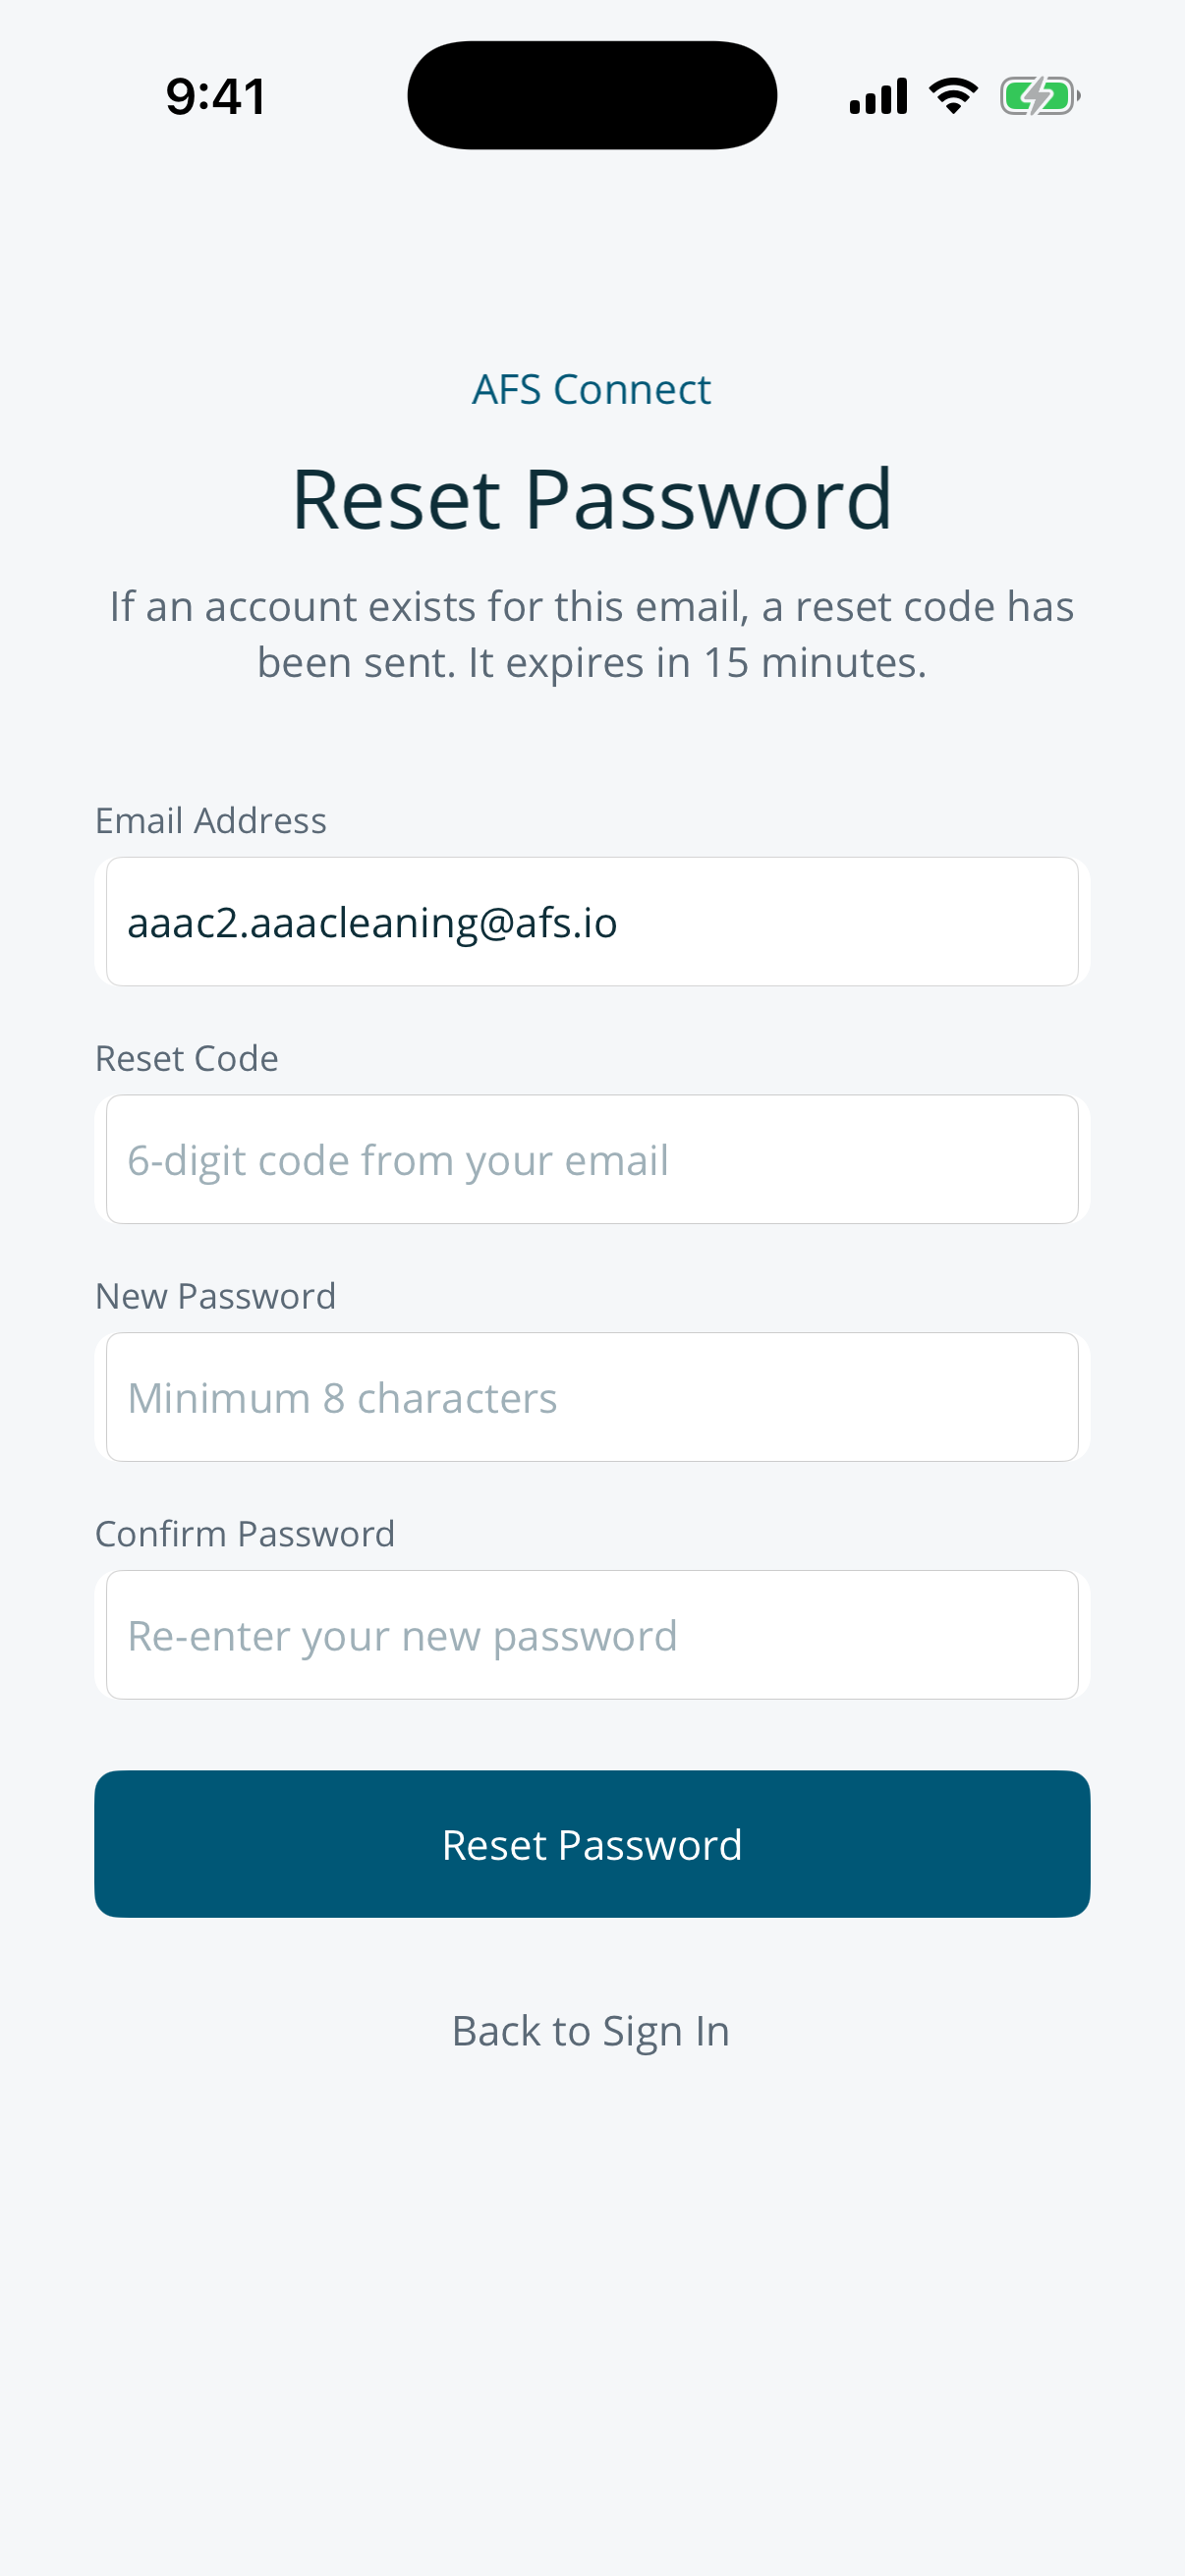
- Check your email for a reset code.
- Enter the code along with a new password, and confirm.
4. Finding Your Way Around
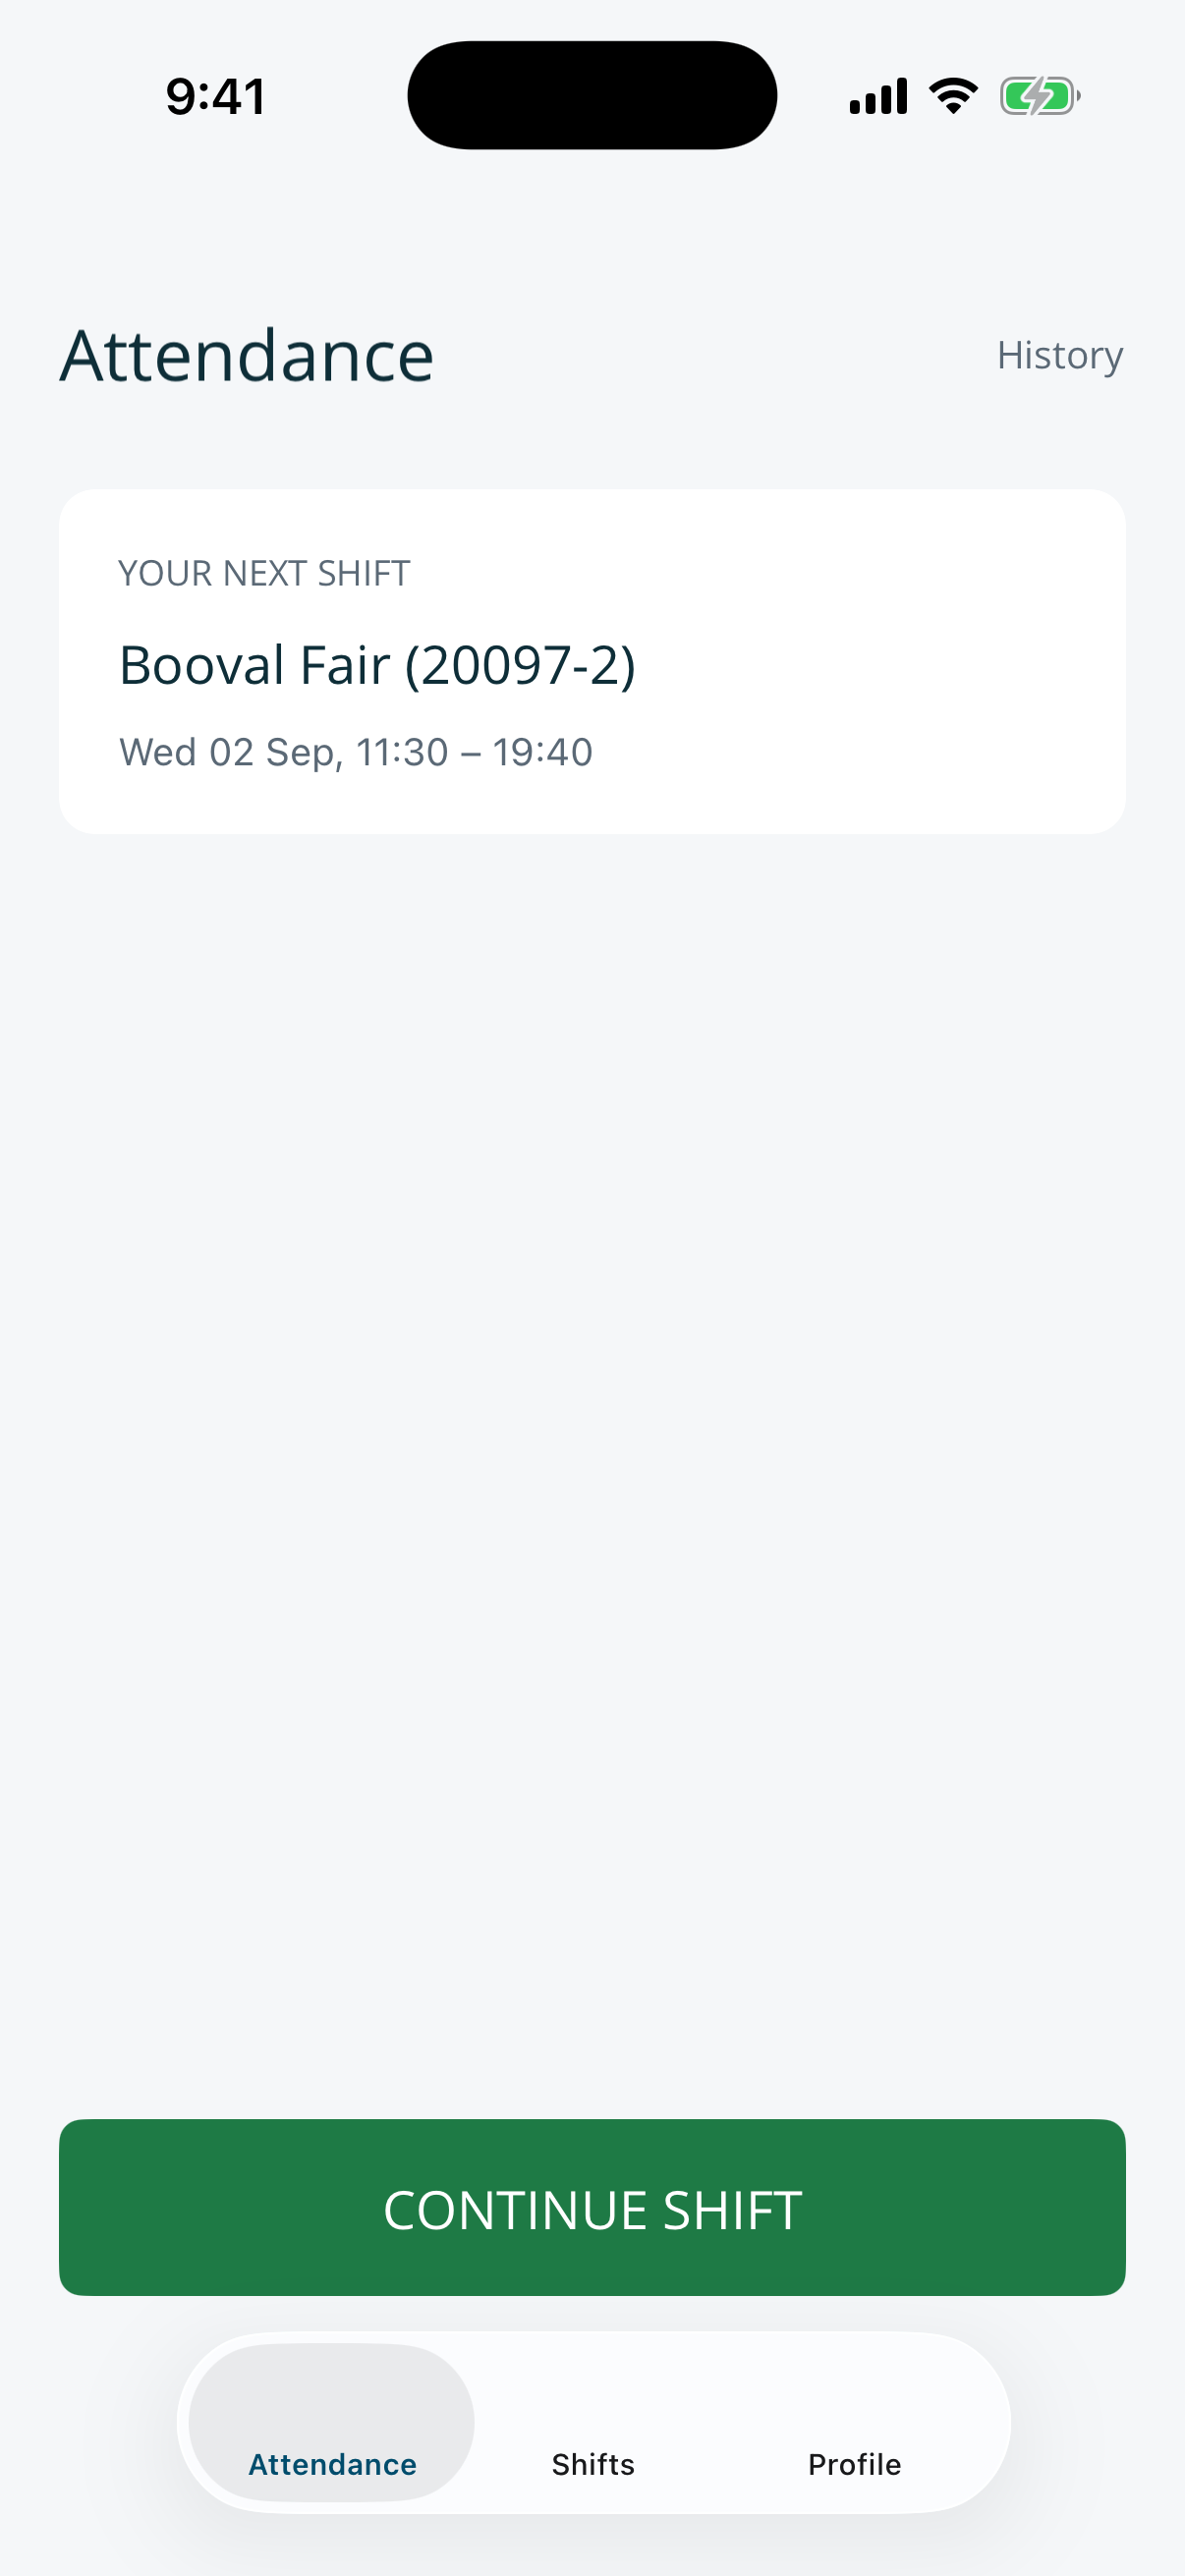
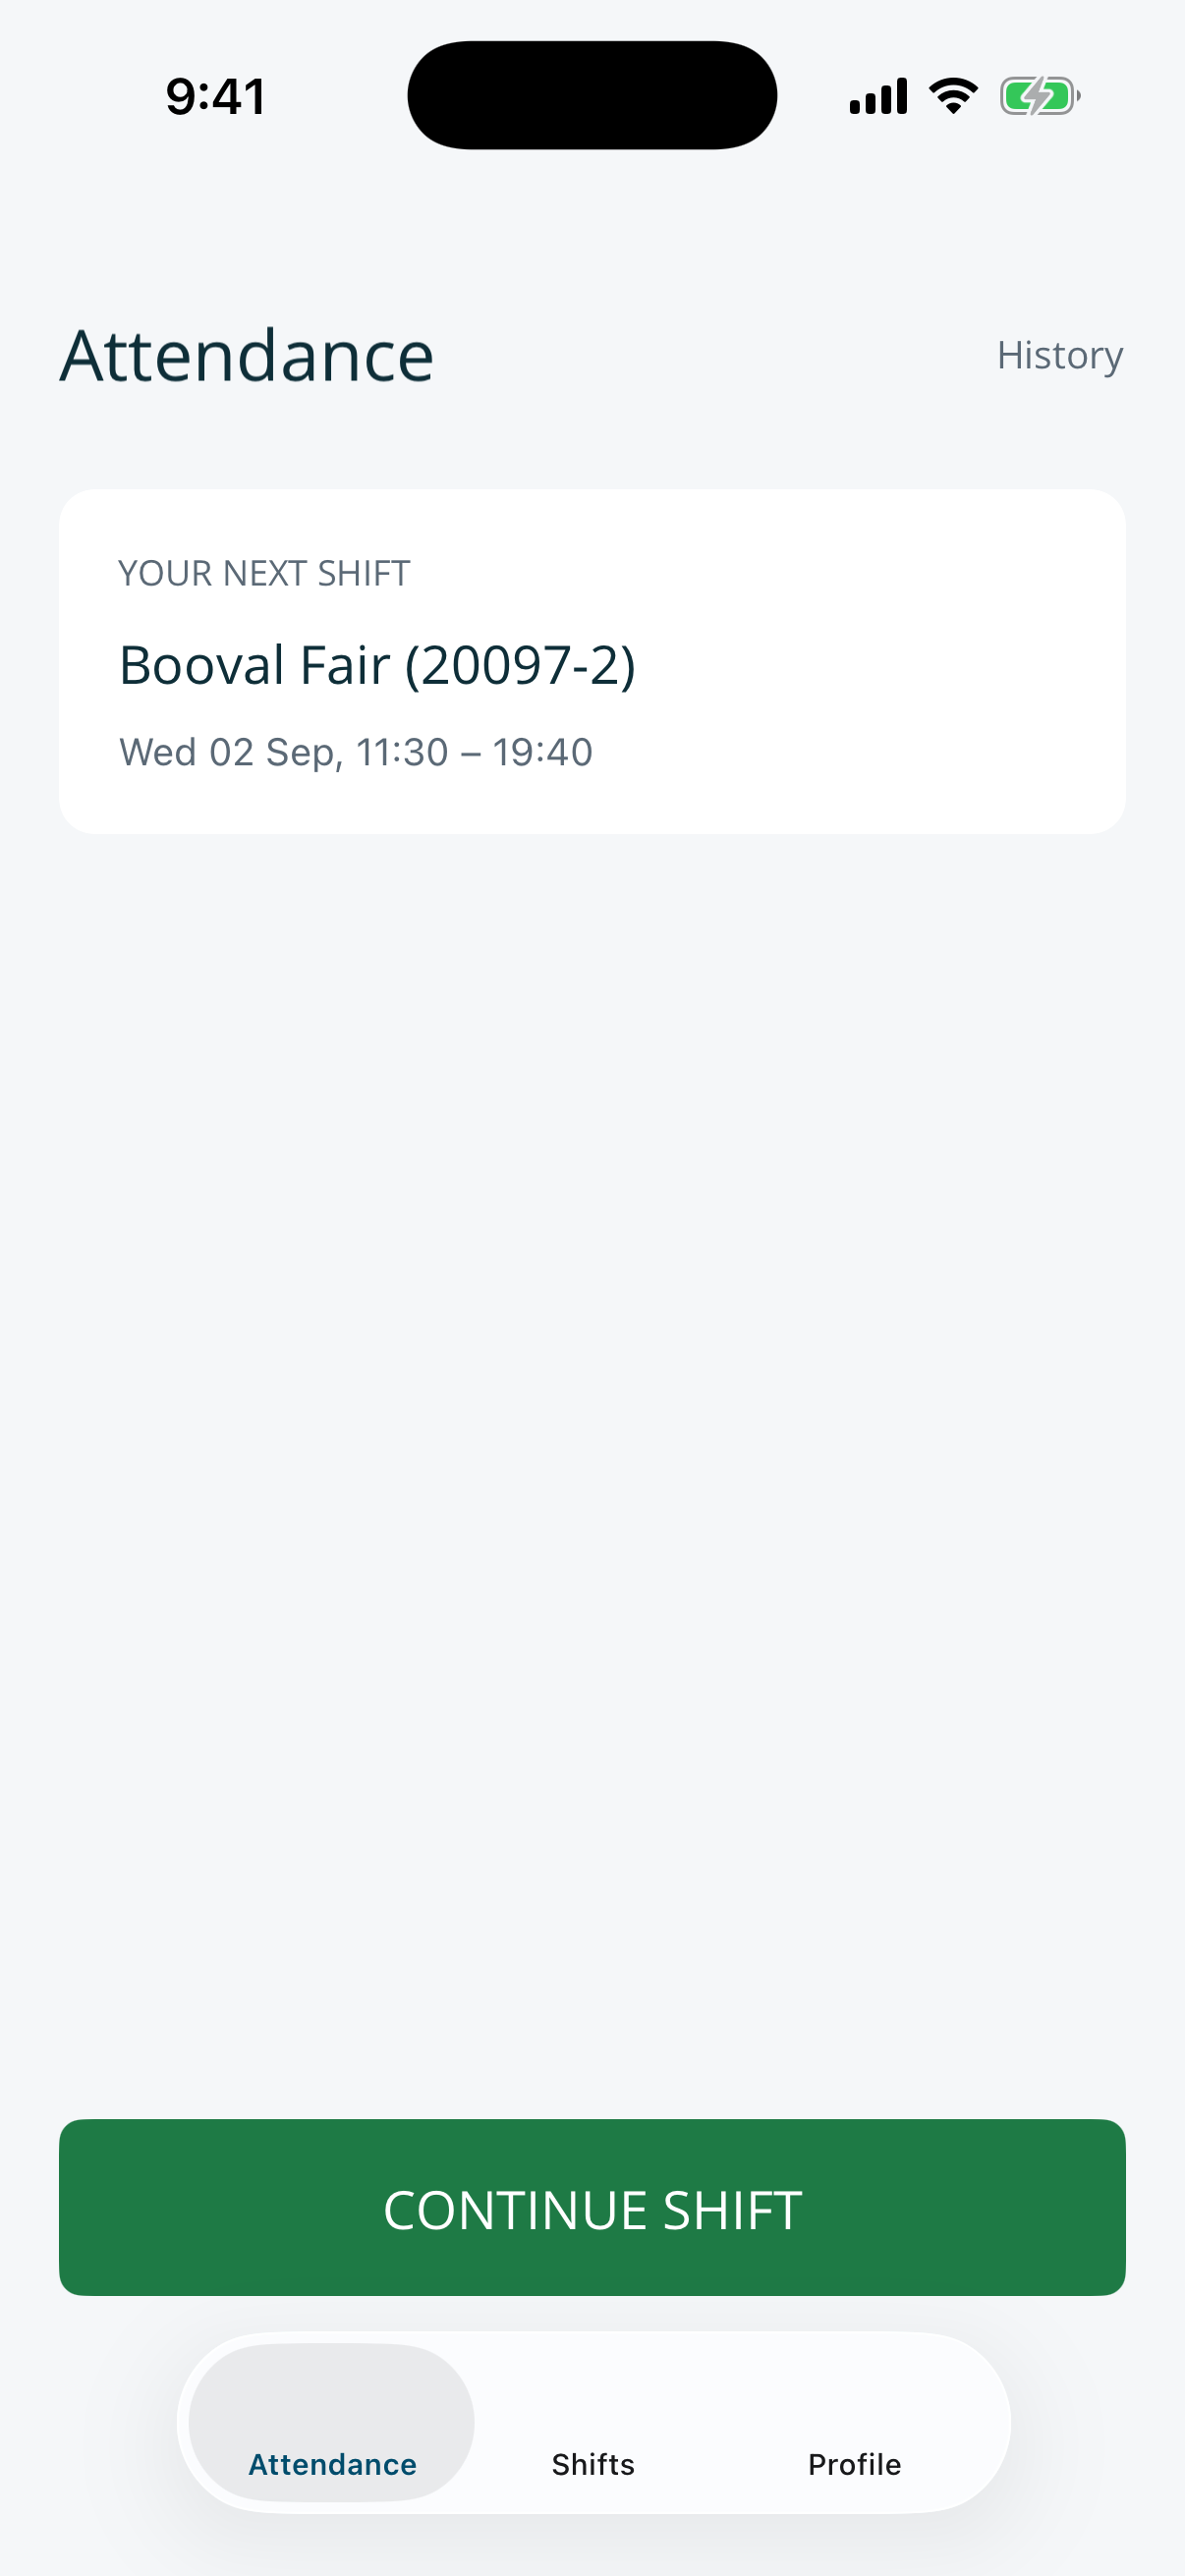
As a Team Member, AFS Connect has three tabs at the bottom of the screen:
| Tab | What it's for |
|---|---|
| Attendance | Your current clock-in status, and a shortcut to your Attendance History. This is the first screen you see after signing in. |
| Shifts | Shifts you can claim (Available) and shifts you've already claimed (My Shifts). |
| Profile | Your details, Attendance History, app information, and Sign Out. |
5. Viewing and Claiming Available Shifts
- Open the Shifts tab. It opens on the Available list by default.
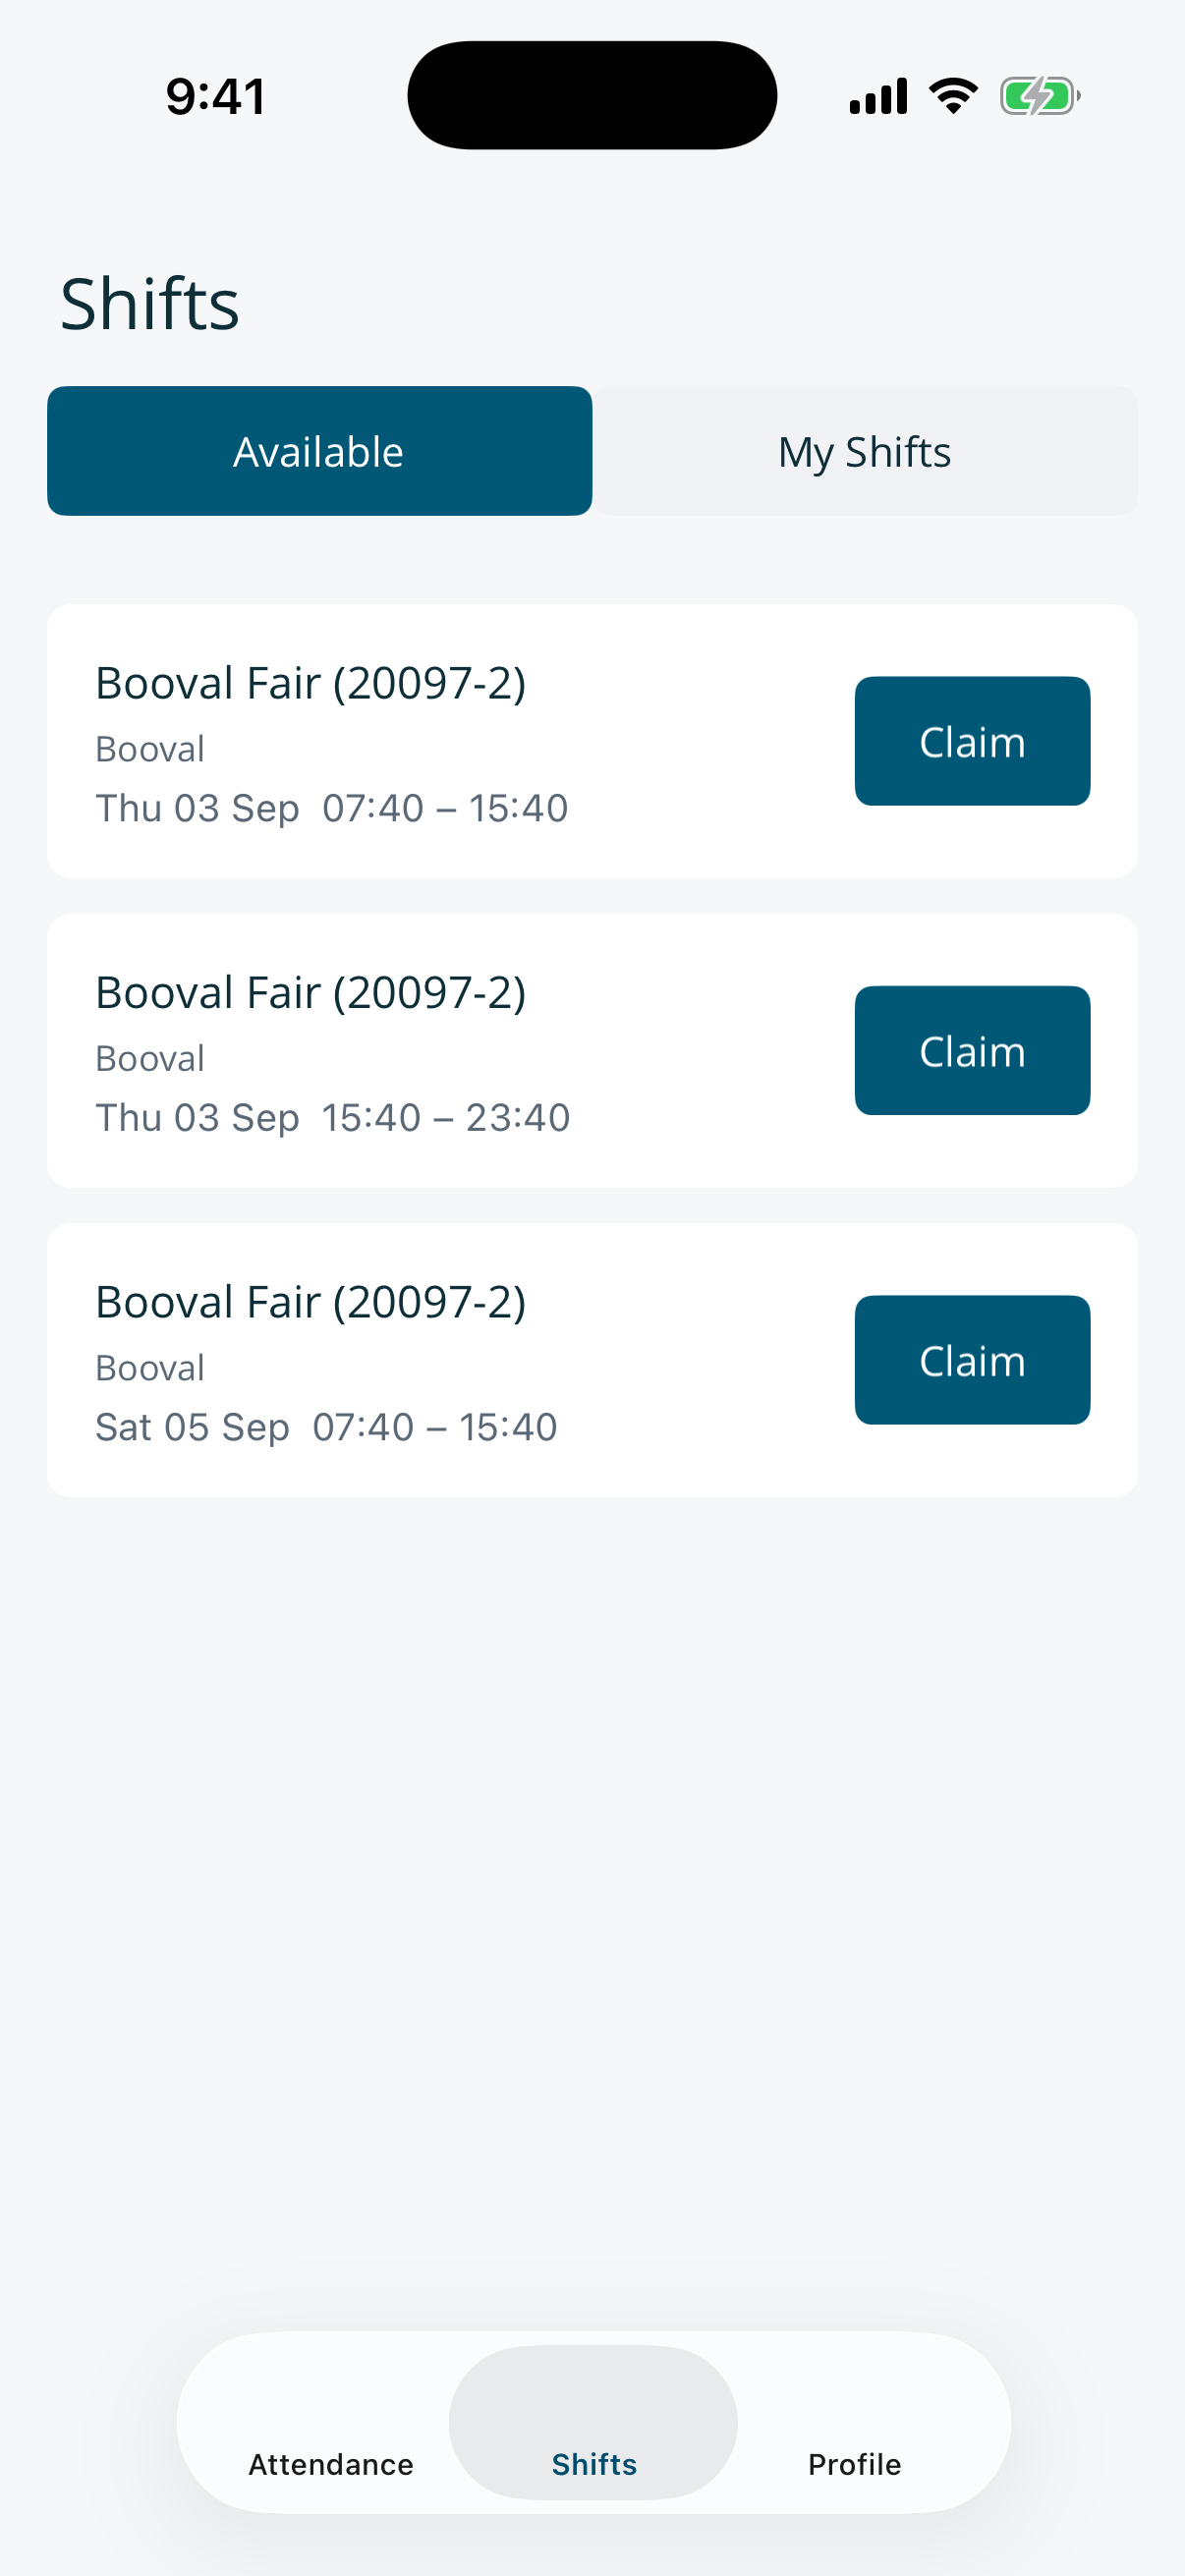
- Each card shows the site, area, and date and time. Tap Claim on the shift you want.
- Confirm in the dialog that appears.
Result: the shift moves to My Shifts, with a Release button in place of Claim.
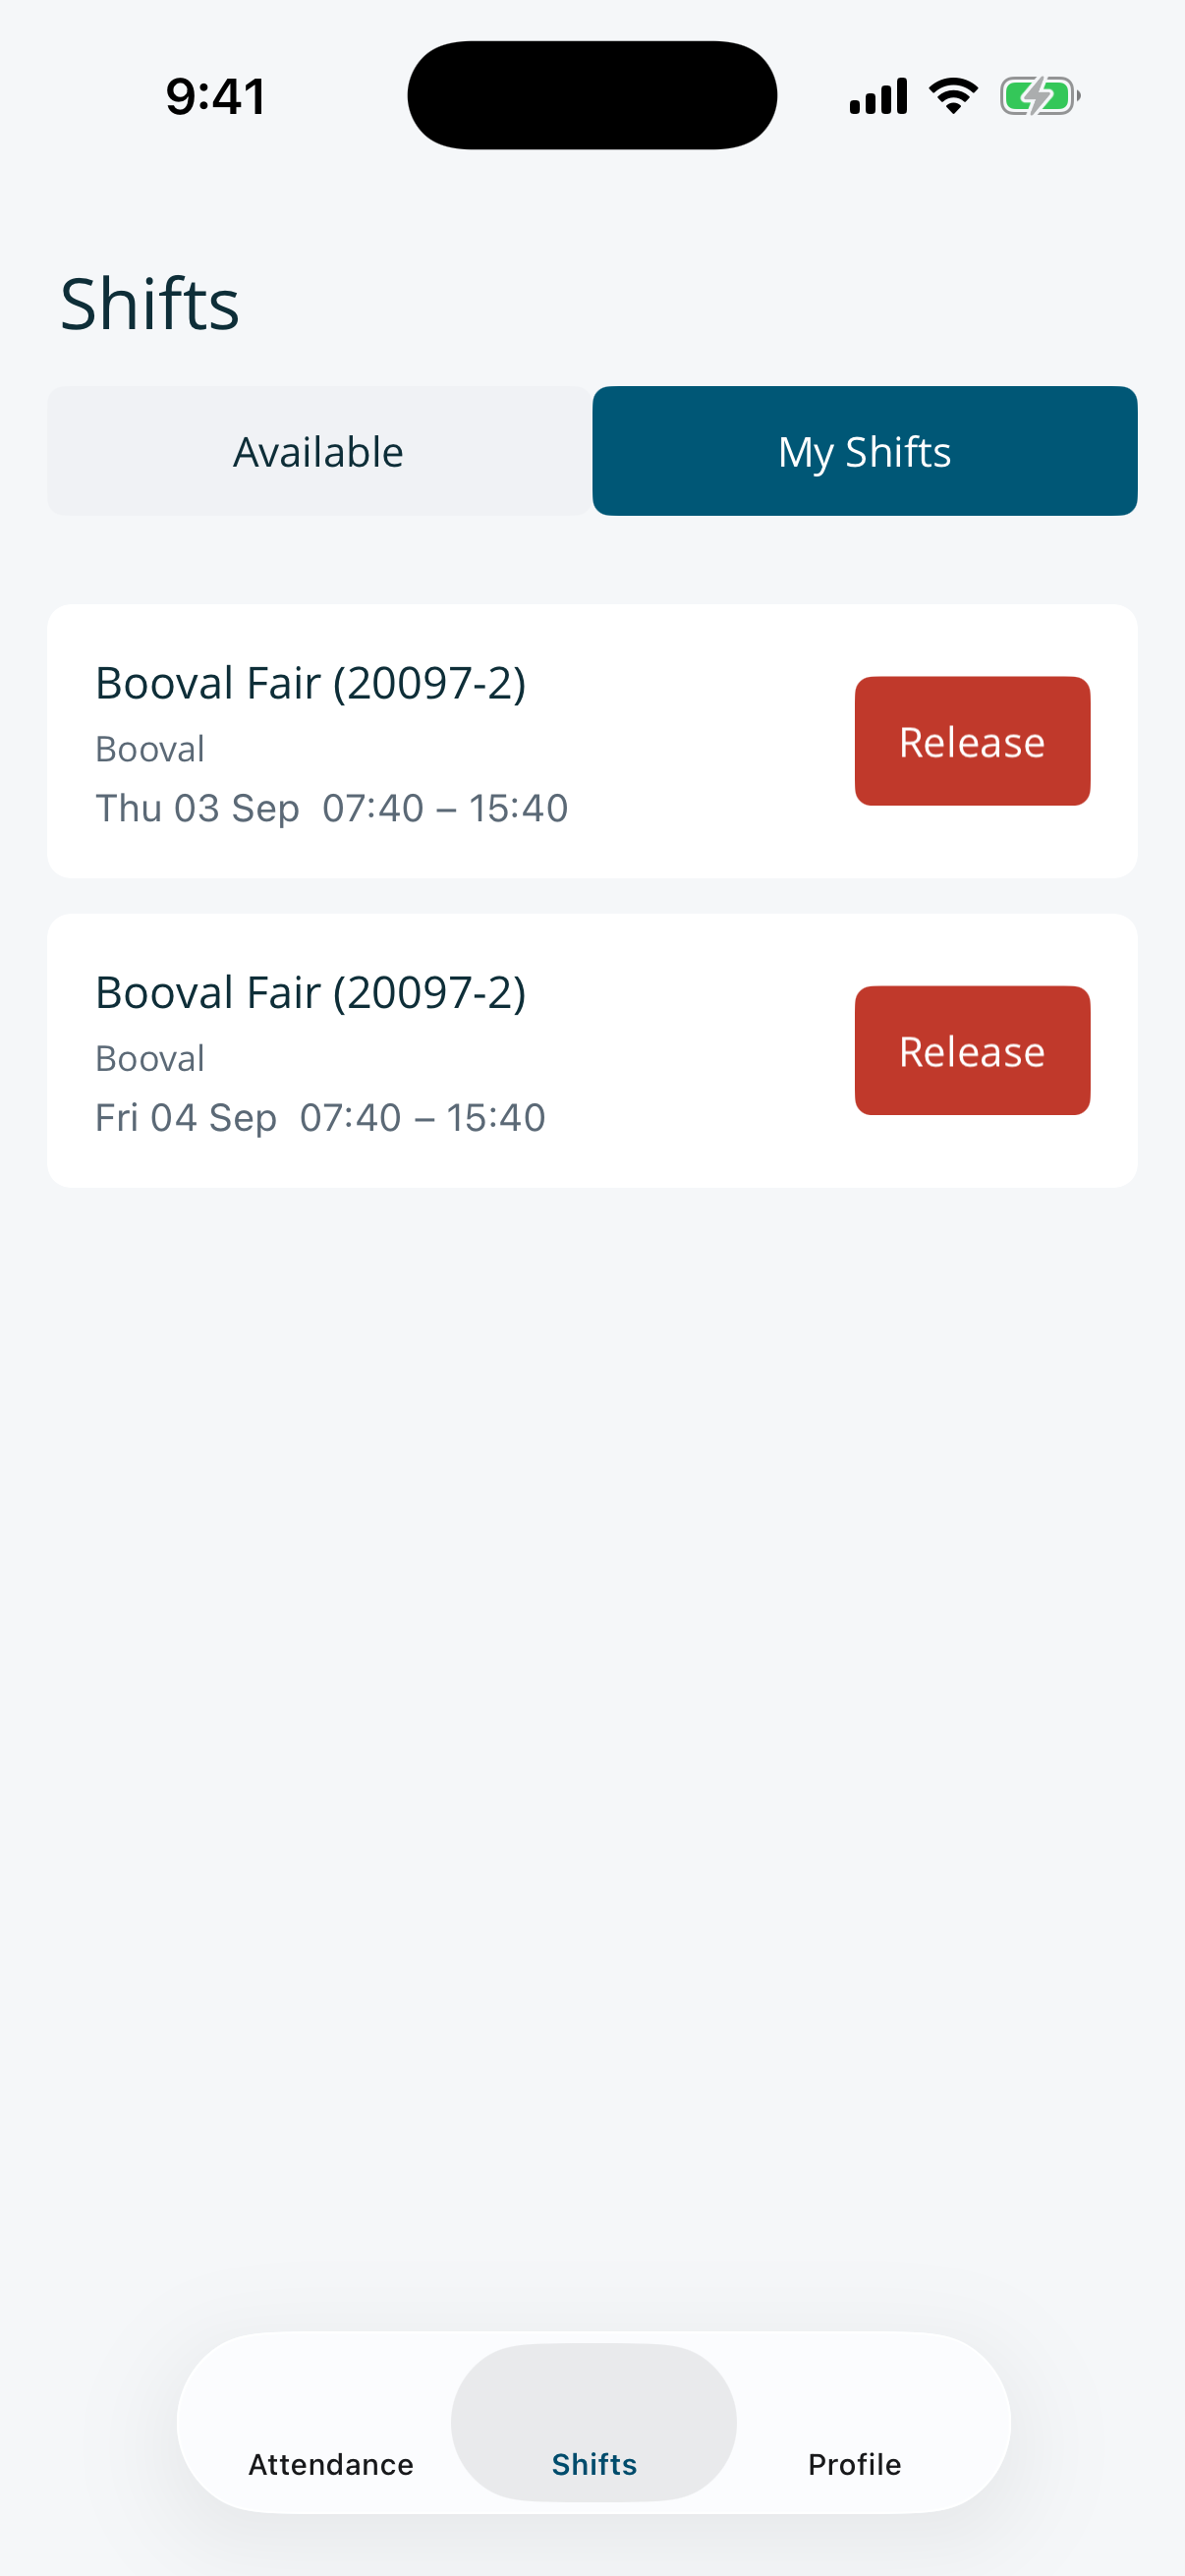
- Only shifts that haven't started yet are shown as Available. A shift drops off the list once its start time passes.
- Claiming is first come, first served. If someone else claims a shift a moment before you, you'll see a message that it's no longer available.
- Pull down on the list to refresh it, or leave and re-open the Shifts tab. It doesn't refresh automatically while you're sitting on the screen.
6. Viewing Shift Details
Tap any shift card, from Available, My Shifts, or your active shift on the Attendance tab, to see its full details.
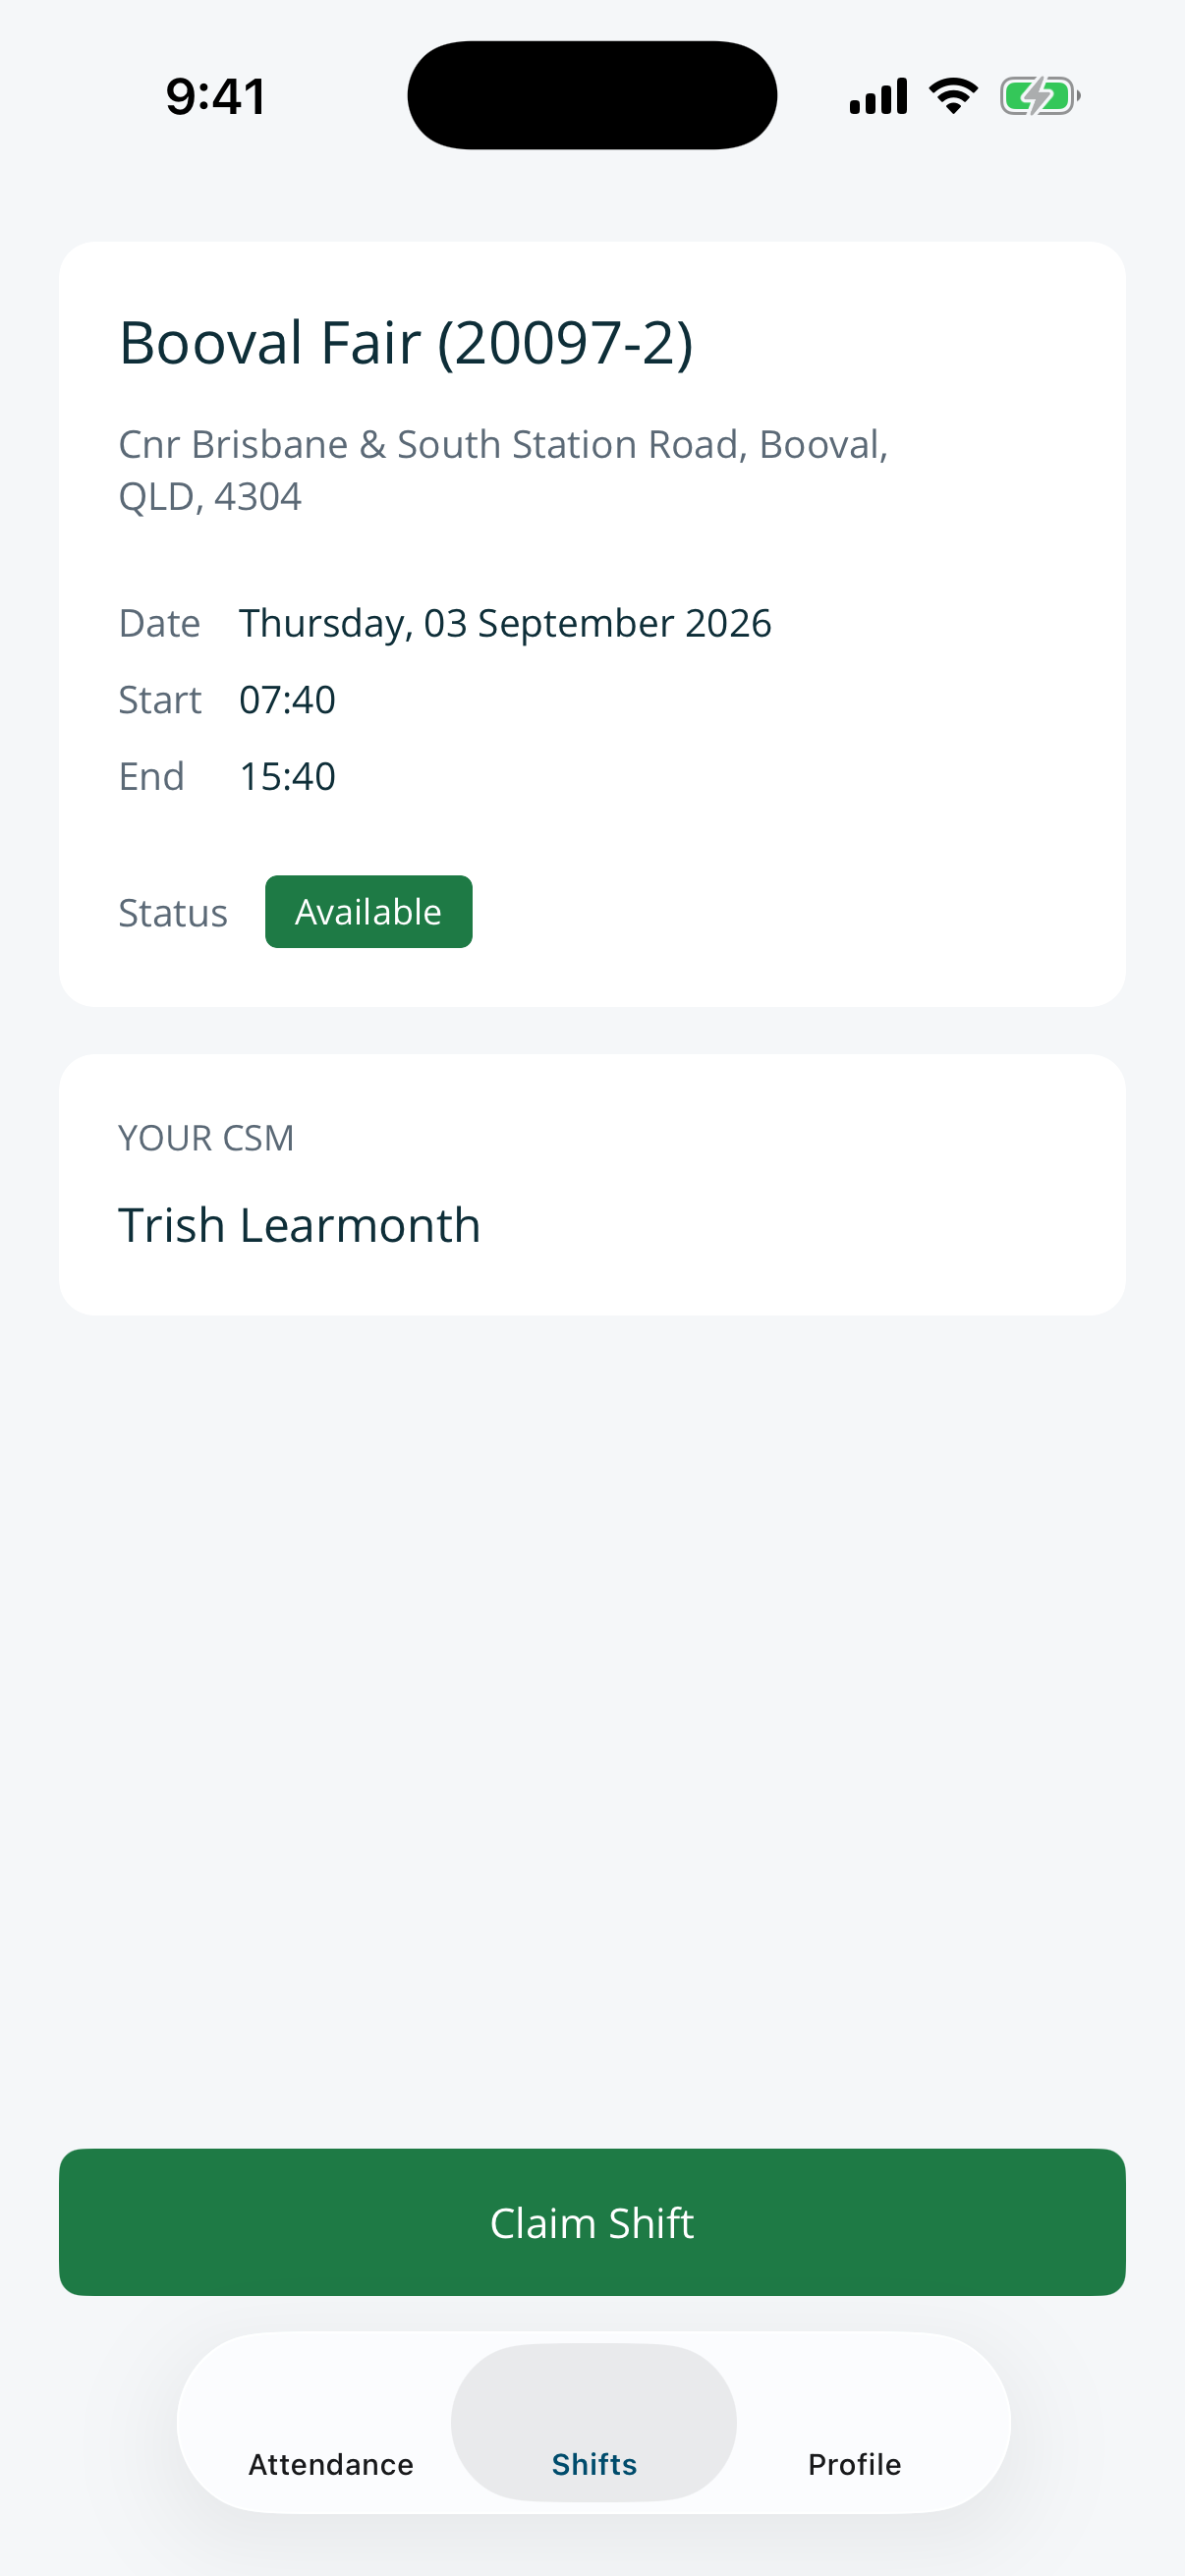
This screen shows:
- Site, area, and address
- Date and time
- A status badge (Available, Claimed by you, or Claimed)
- Your CSM (Client Success Manager) for the site, with tap-to-email and tap-to-call where available
- Shift instructions, if your AFS office has added any notes for this shift
- Buttons at the bottom for whatever you can do next: claim, clock in, continue, release, or a status message
7. Clocking On
- From Shift Details, or from the Attendance tab once you have a claimed shift, tap Clock In.
- Confirm in the dialog.
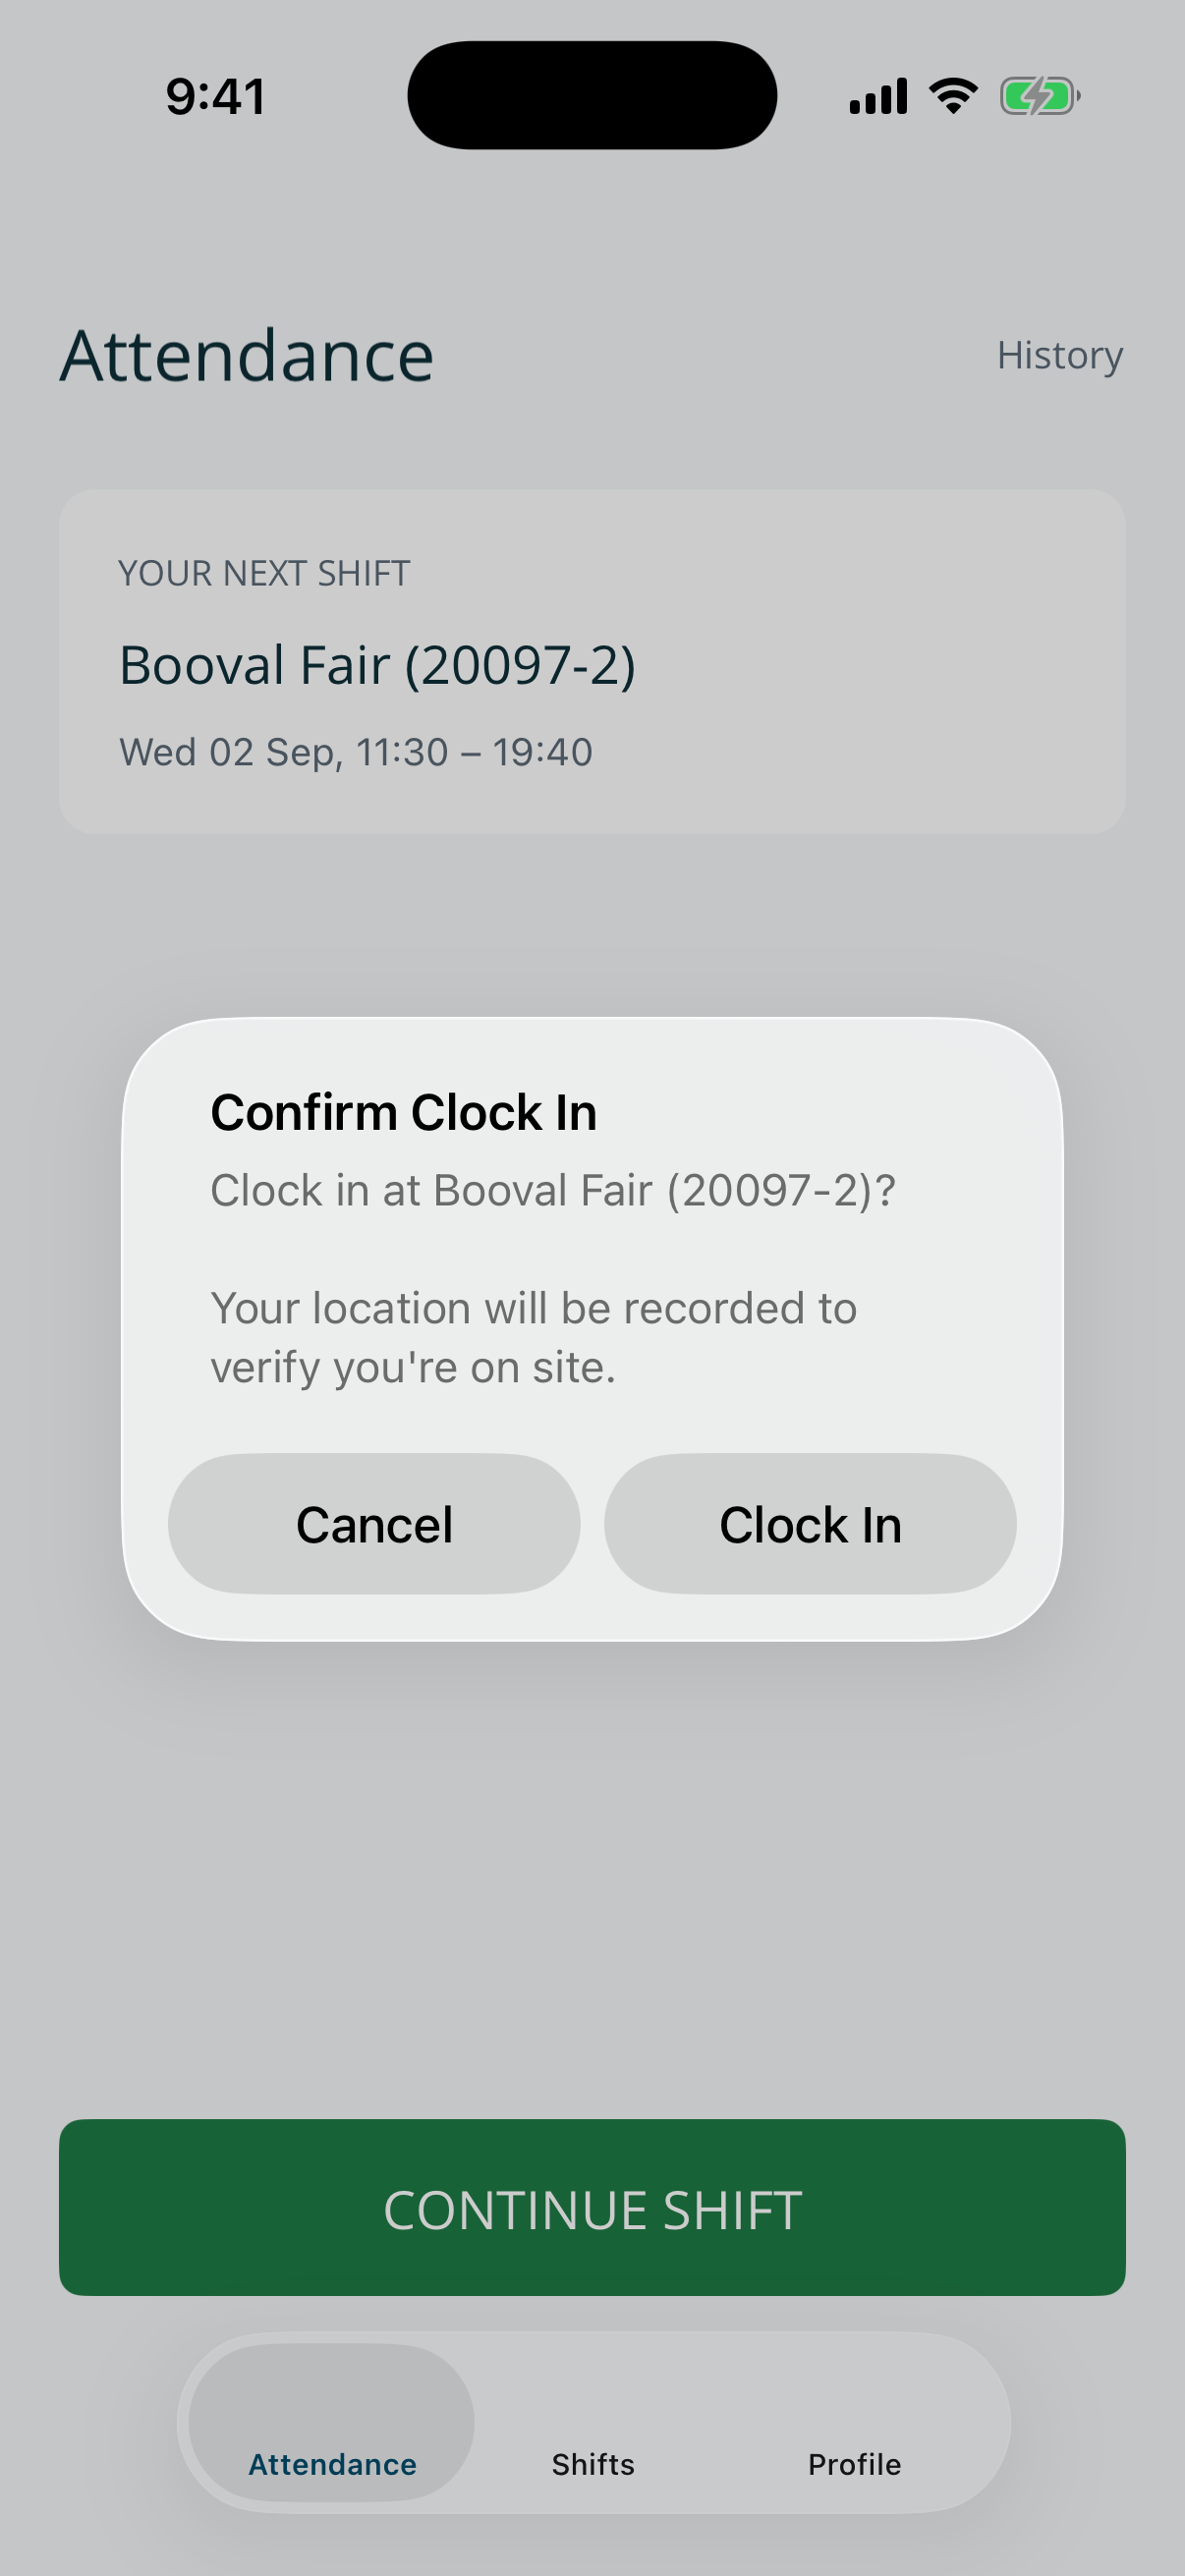
The first time you clock in, iOS will ask to allow AFS Connect to use your location. Choose the option to allow it while using the app.
If you're outside the site's boundary, you'll see a warning showing your distance from site, with the choice to Proceed Anyway or Cancel. Proceeding is always allowed, it's simply flagged so your manager and AFS can see the difference.
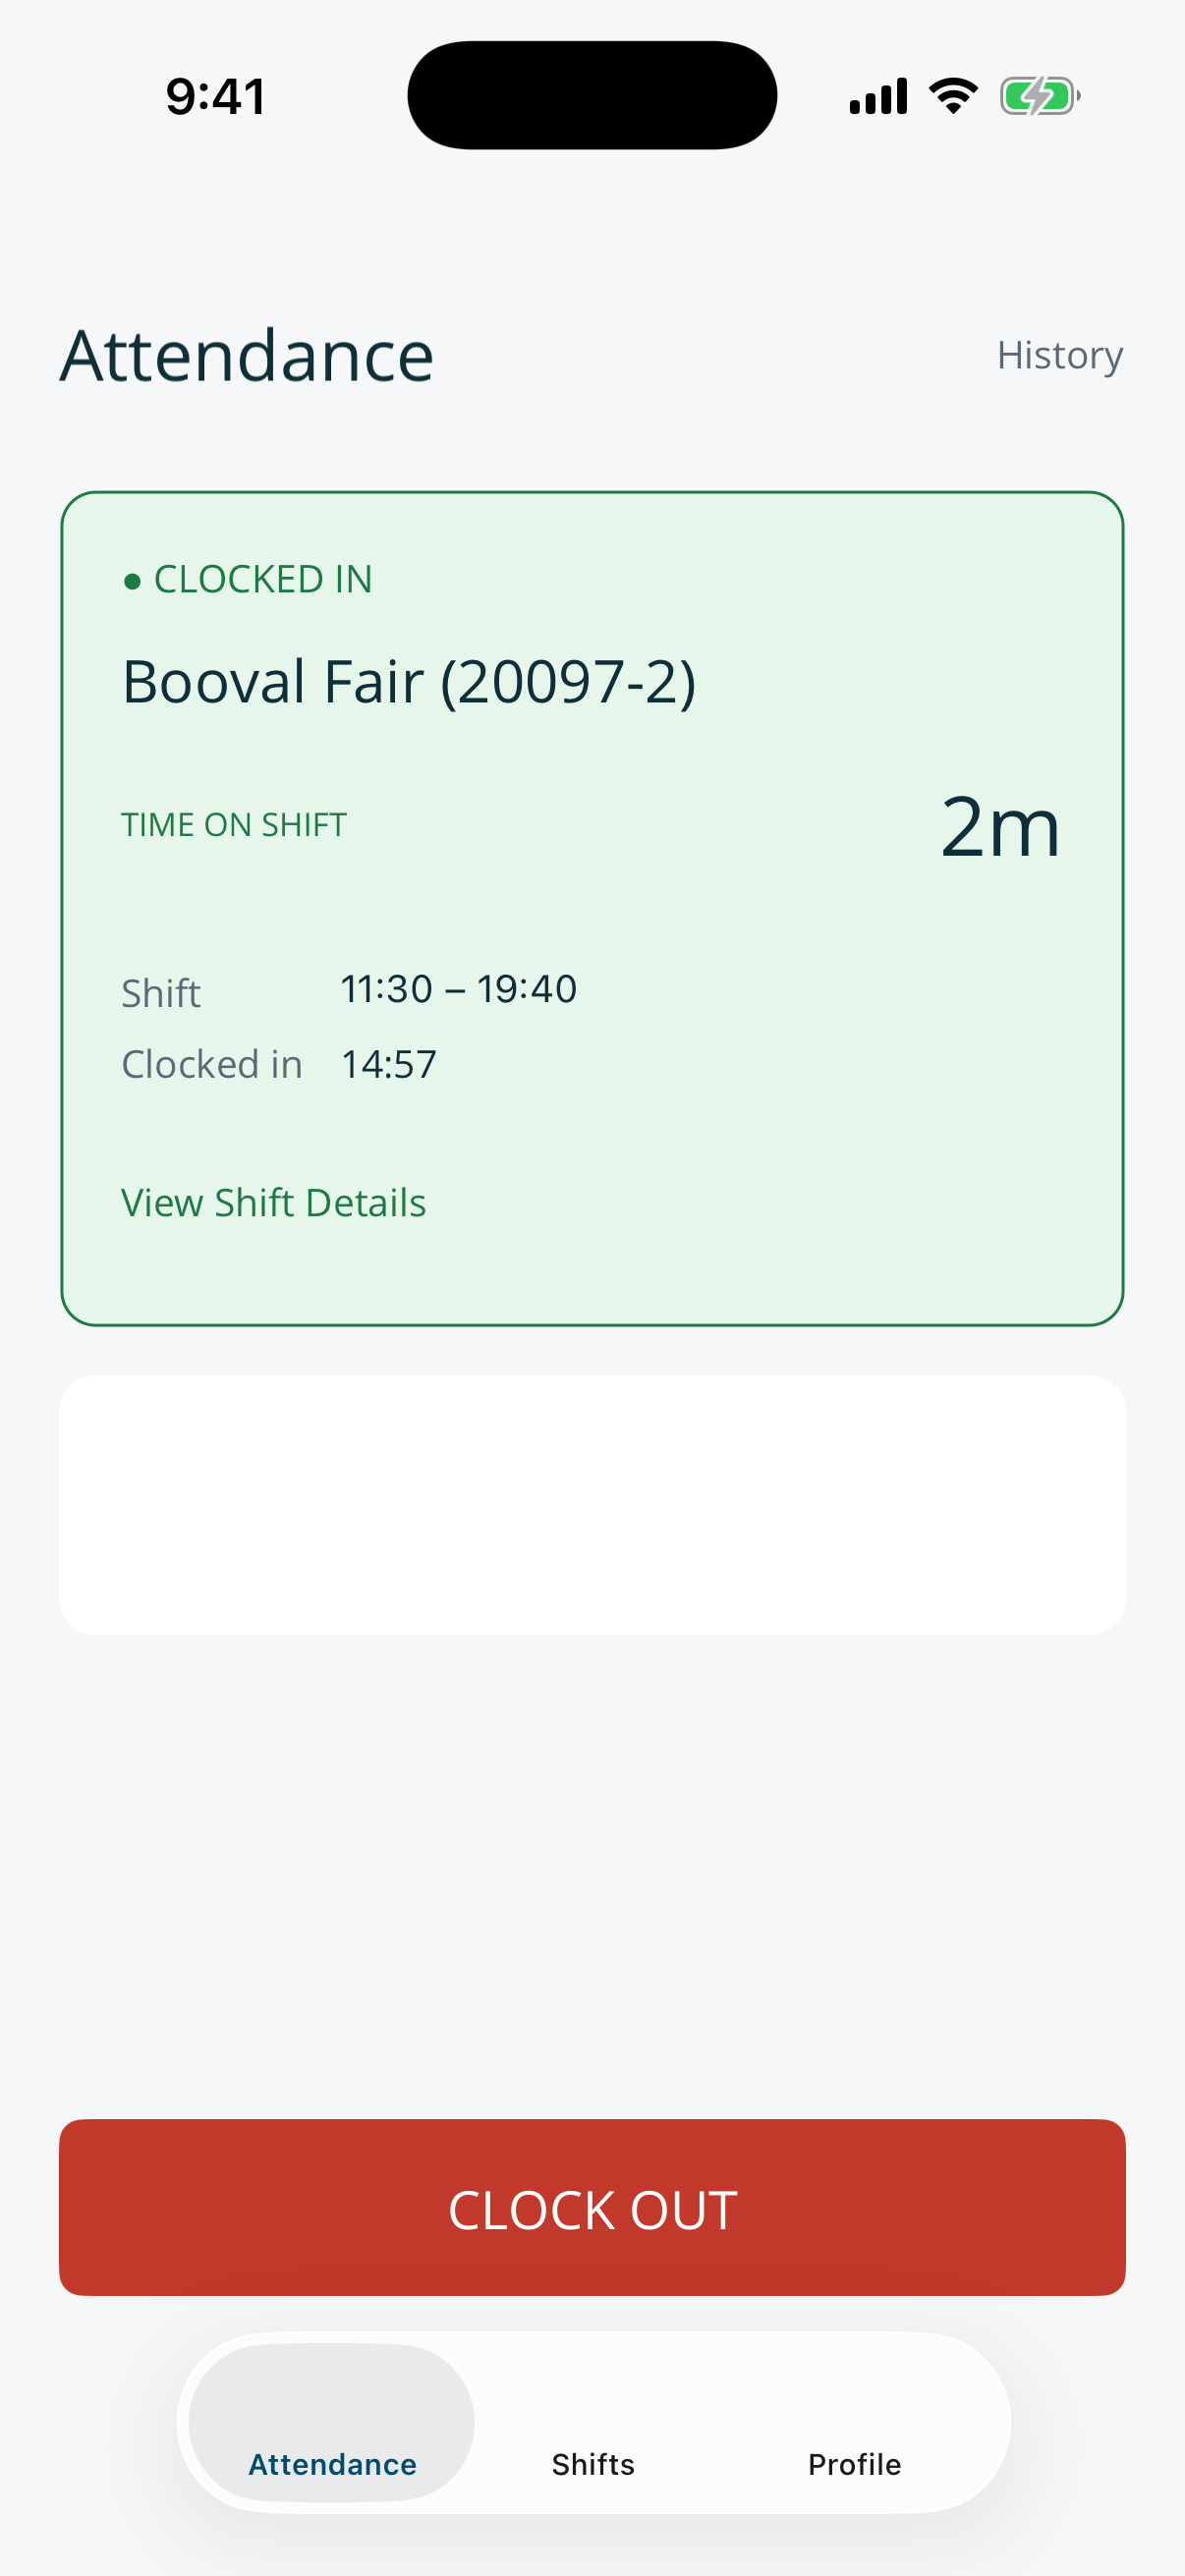
Result: you're clocked in. The Attendance tab shows a live card with a running timer, your shift's scheduled times, and your actual clock-in time.
8. Clocking Off
- From the Attendance tab, tap Clock Out.
- If you've worked less than 15 minutes, you'll see a warning first. You can still clock out, it's flagged for review.
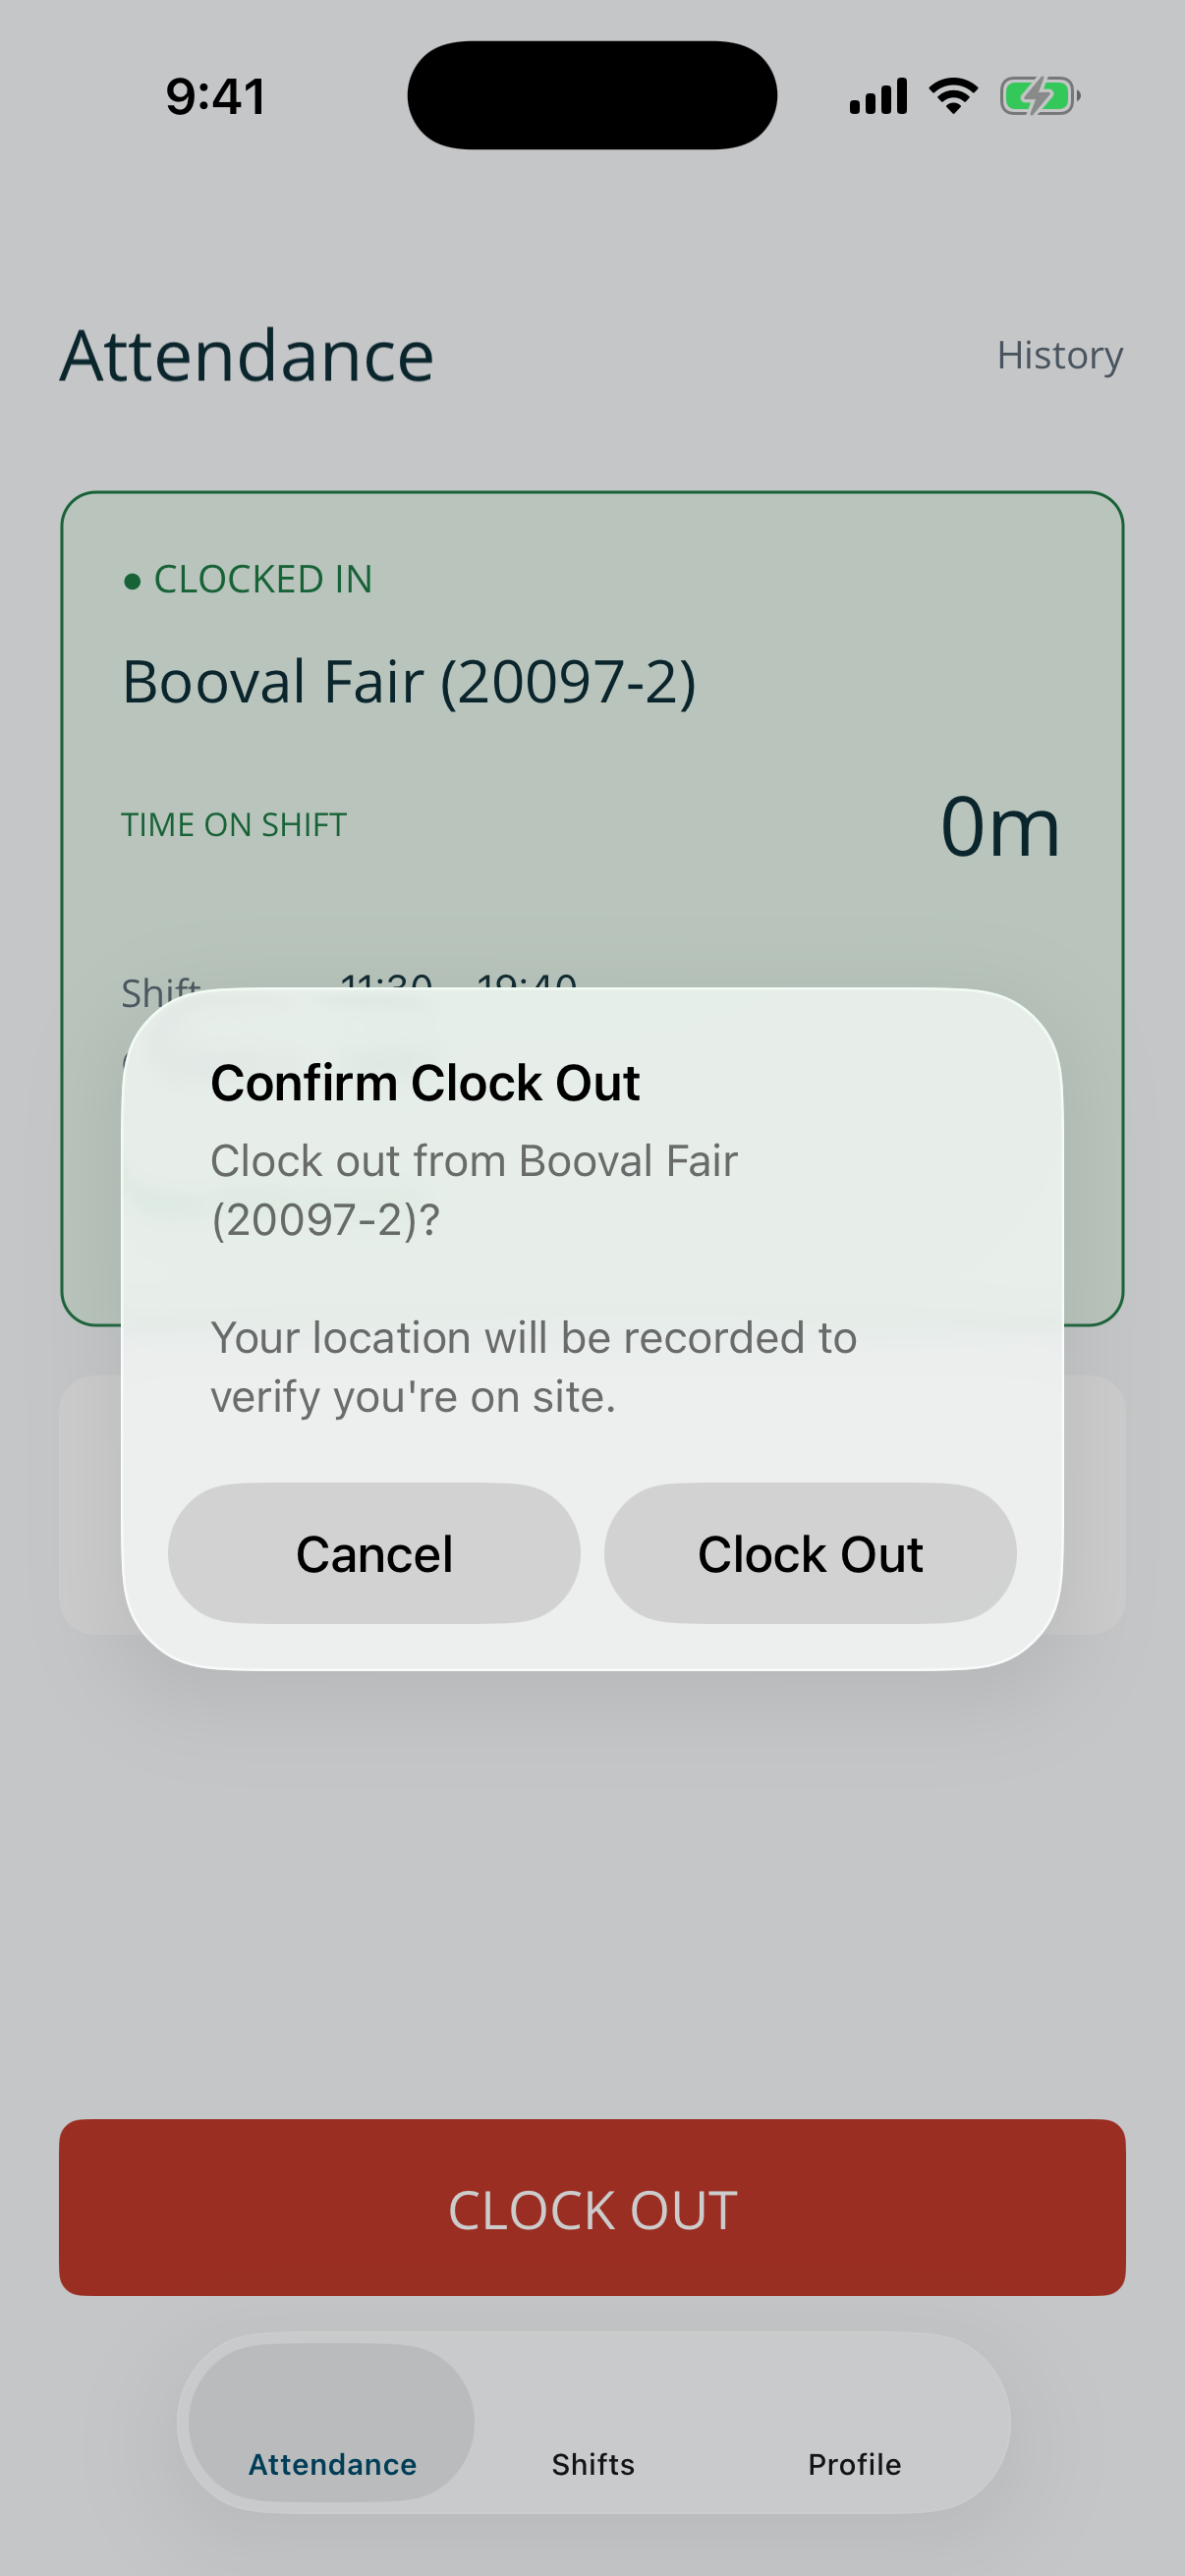
Confirm. You'll go through the same location check as clocking on.
Result: your shift closes, and the finished segment appears in your Attendance History.
9. Continuing a Shift After a Break
If you need to step away and come back, for example an unpaid meal break, you can continue a shift once after clocking out of it.
- Go to My Shifts or the Attendance tab. The shift's button now reads Continue Shift instead of Clock In.
- Tap it and confirm, the same as a normal clock in.
The time between your clock-out and your next clock-in is recorded as an unpaid break.
Continuing is not available if:
- You've already continued this shift once (two segments is the maximum)
- You've already worked the shift's full rostered hours
- The shift's scheduled end time has passed and more than 2 hours have gone by since you last clocked out
10. Releasing a Shift
Changed your mind about a shift you've claimed but haven't started yet?
- Open My Shifts and tap Release (or open the shift and tap Release Shift).
- Confirm.
The shift returns to Available for someone else to claim.
11. Your Attendance History
- From the Attendance tab, tap History, or from Profile, tap Attendance History.
- Each entry shows the site, area, date, clock-in and clock-out times, and total duration.
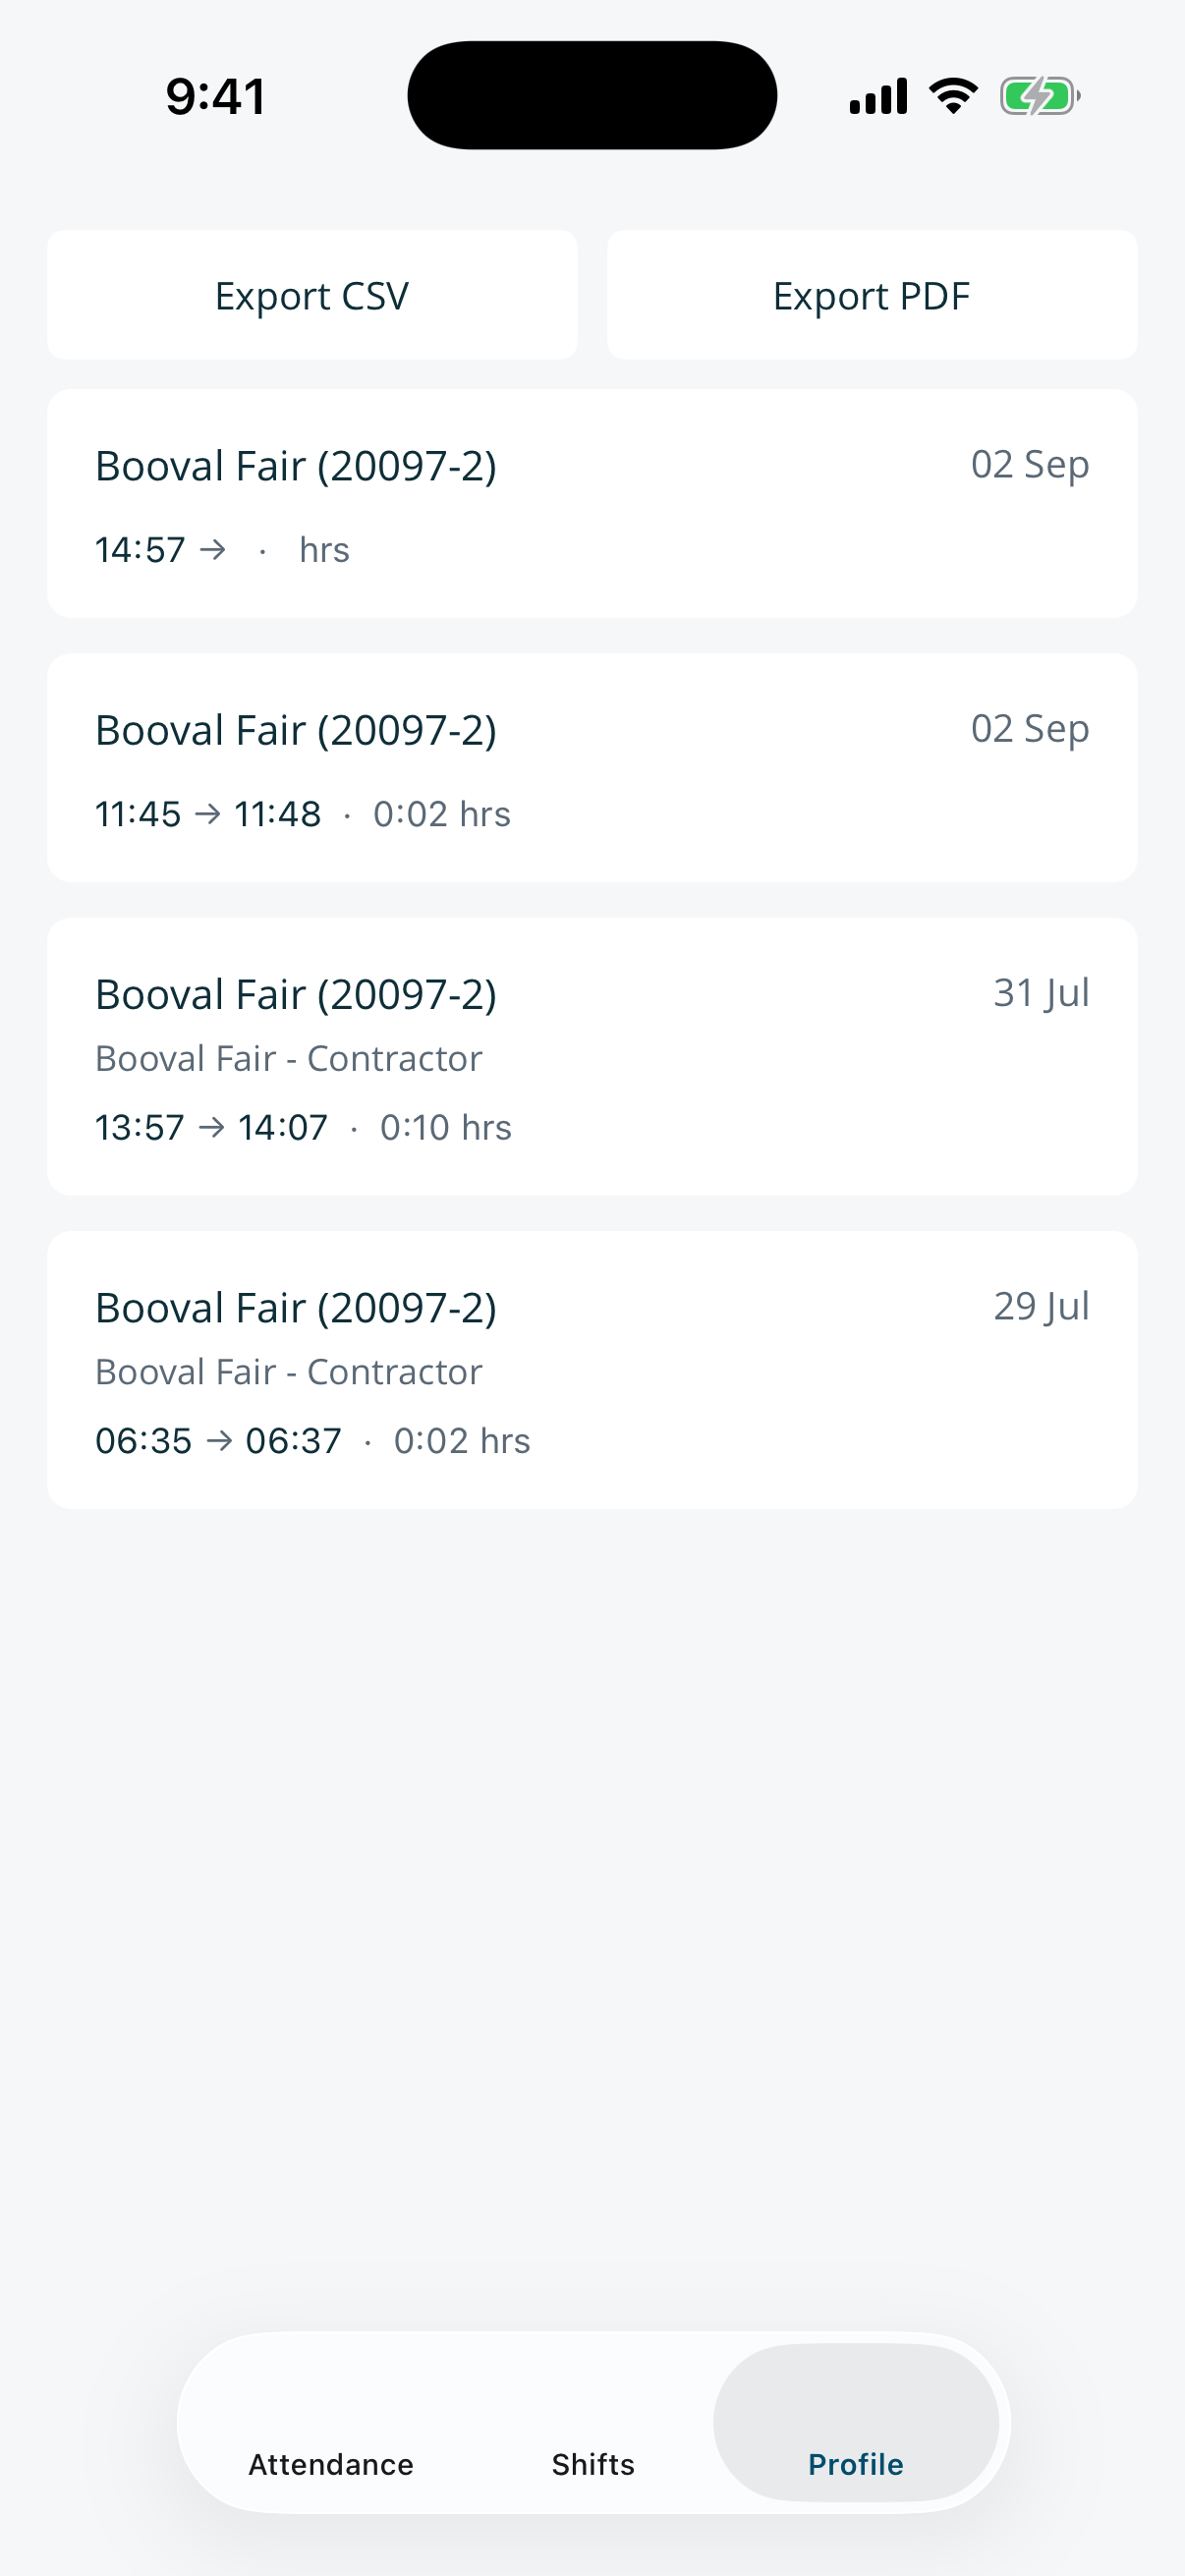
If you continued a shift after a break, both segments appear as separate entries, most recent first. Your history only ever shows your own records.
12. Exporting Your Attendance Records
- From the top of Attendance History, tap Export CSV or Export PDF.
- iOS's share sheet opens with a ready-made file, save it, email it to yourself, or send it wherever you need.
The file covers the last 3 months and lists, for each entry, the date, site, shift window, clock-in and clock-out times, and whether it was verified on site. It's a record of your app activity, not a payslip, your pay is worked out by your employer under your own engagement terms, not by AFS.
13. Managing Your Profile
Open the Profile tab to see your name, role, email, mobile number, company, and the date you joined.
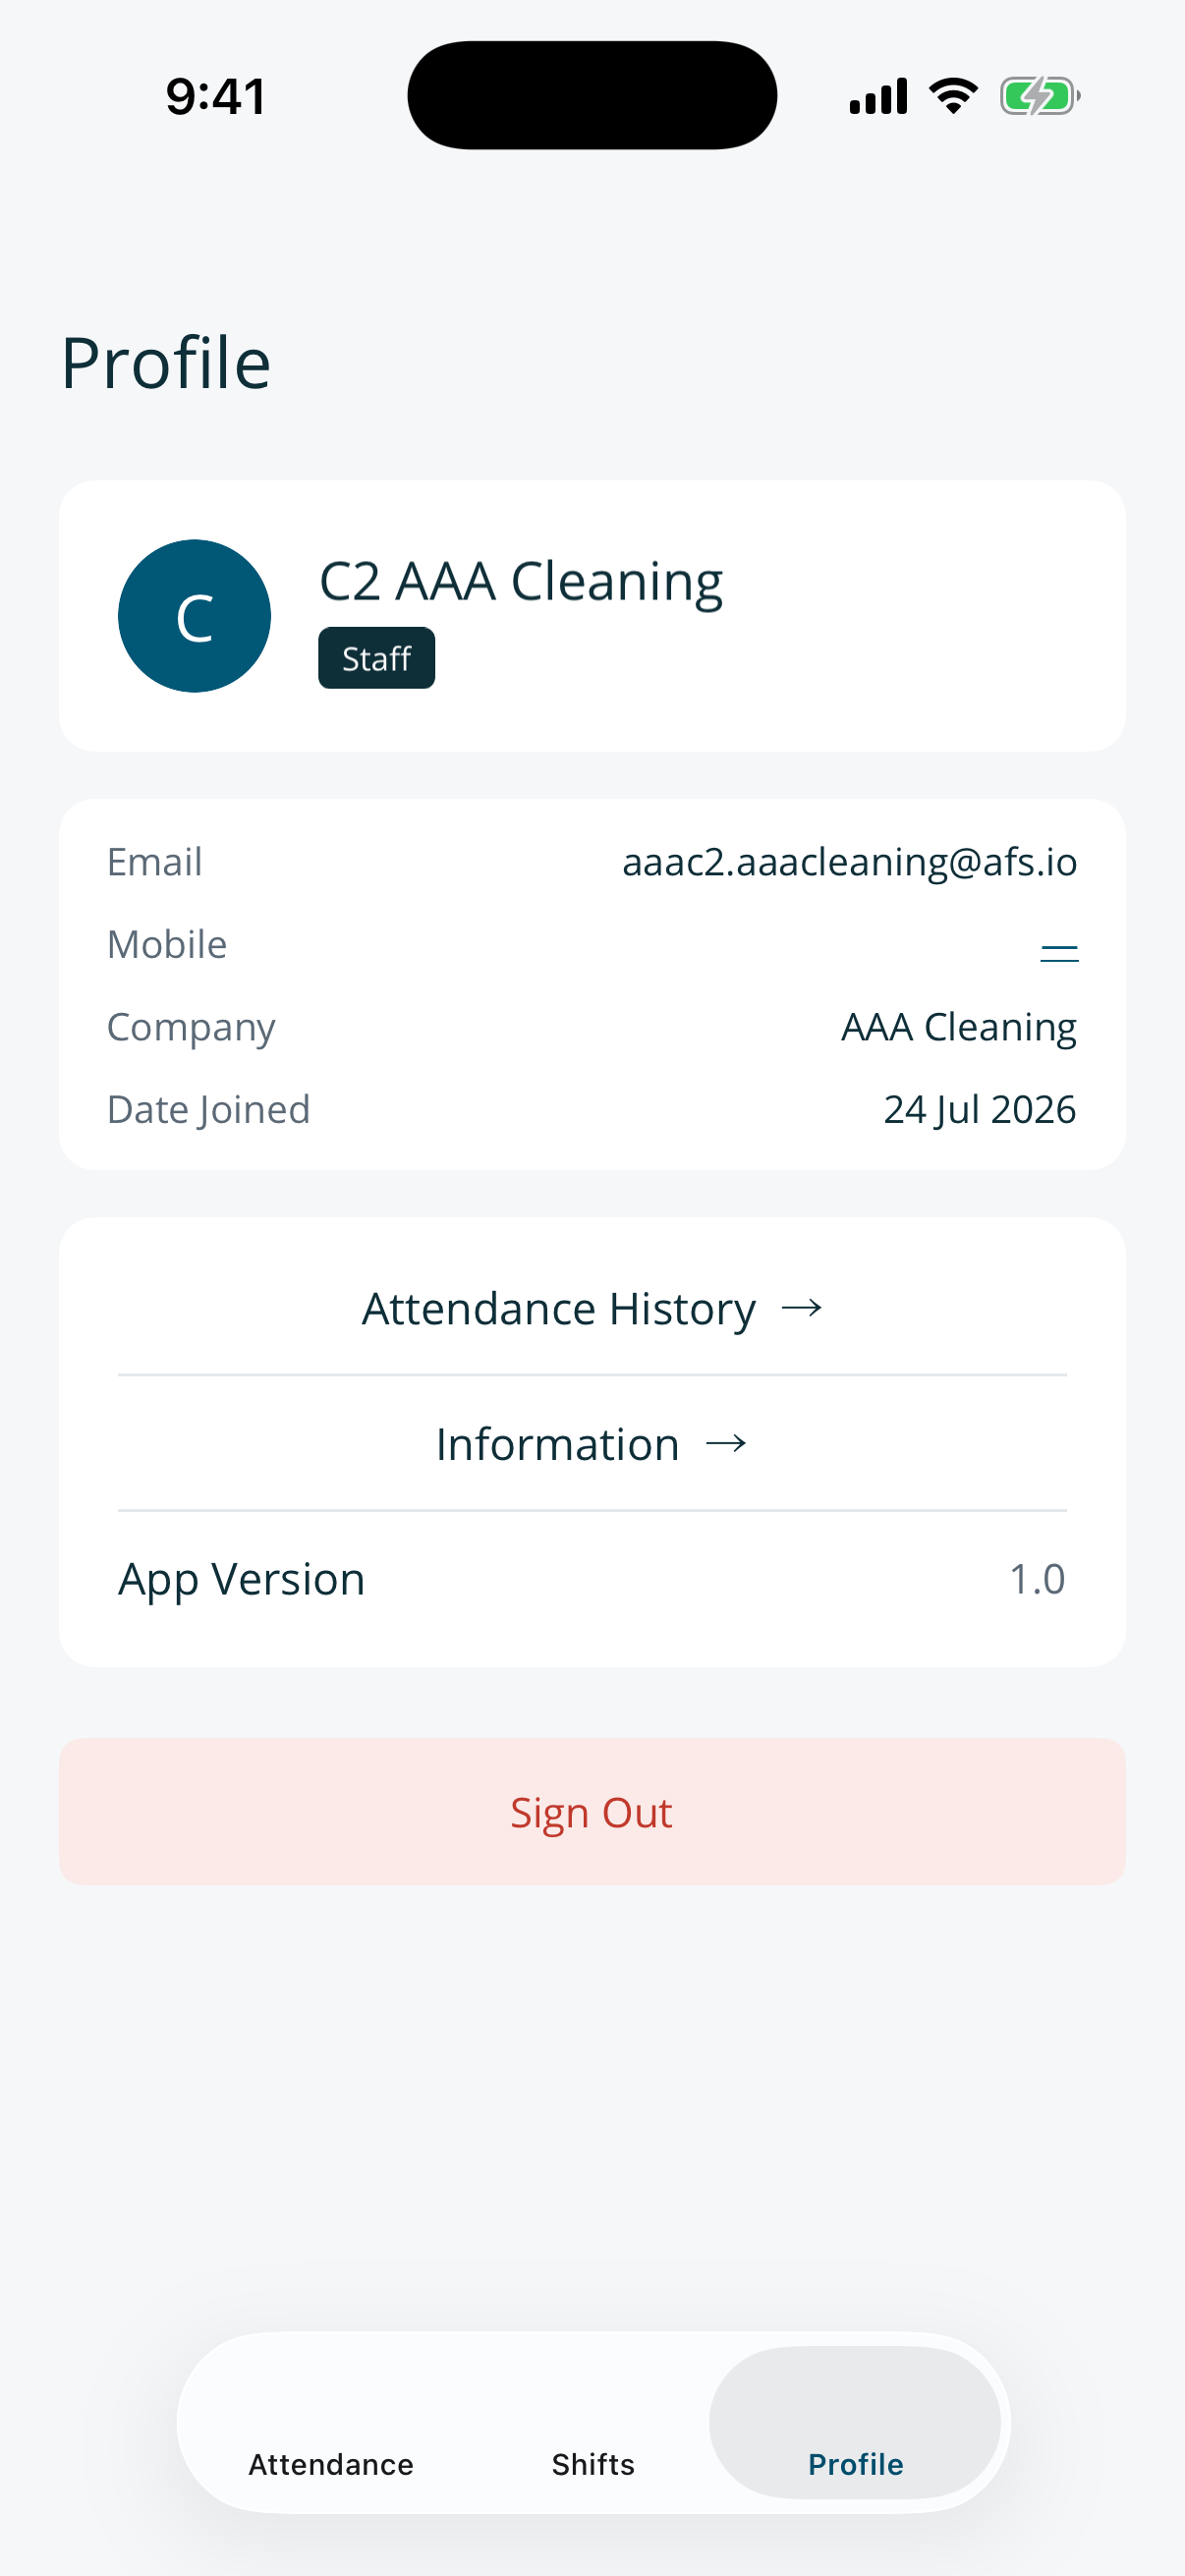
- Tap your Mobile number to update it at any time.
- Tap Attendance History or Information to jump to those screens.
- Tap Sign Out at the bottom when you're done. If you have clock events still waiting to sync, you'll be warned before they're discarded.
Information (Profile > Information) shows the app version, a short description of AFS Connect, our support email, and links to the Privacy Policy, Terms of Service, EULA, Acceptable Use Policy, and account deletion.
14. Deleting Your Account
- From Profile, tap Information, then tap Delete My Account (shown in red).
- Read the disclosure screen. It explains what's deleted (your name, email, phone, login, and company or site association), what's kept and why (your attendance records, for invoice verification and tax purposes, these can no longer be linked back to you once your account is gone), and that your employer's own records aren't affected.
- Optionally, tap Export My Data First to get a copy of your attendance history.
- Tap Delete My Account, then confirm once more.
Result: your account is deleted immediately, there's no waiting period. Everything on your phone (saved shifts, attendance, your login) is cleared in the same step, and you're signed out.
15. Getting Help
If something isn't working as expected, or you have a question this guide doesn't cover:
Email: afsconnect@australfs.com.au
You can also find our Privacy Policy, Terms of Service, EULA and Acceptable Use Policy from Profile > Information at any time.